Impregnable NAS: hardening and protecting Synology
A modern NAS is quite capable of protecting itself from most attacks and guaranteeing not only the continuity of the service, but also the inviolability of the stored data. Even with minimal settings and following the manufacturer's recommendations, the NAS can become an impregnable fortress for an attacker, so reliable that you can connect the device directly to the Internet without a Firewall, leave it literally in an unguarded place (which is important for peripheral installations), being absolutely sure that even if it is physically stolen, your data will not be in the hands of competitors and will not be merged into the network.
By default, all Synology NAS's from the factory provide a sufficient level of security to ensure the safety of data, and moreover, the company recently included a Security Advisor package in the DSM operating system, which, by scanning the device settings, points you to security weaknesses and suggests changing the password somewhere, changing settings somewhere to protect against potential threats. This is more than enough for a home or even SOHO office, but since security is never superfluous, in this article we will tell you exactly how Synology protects your data and how to make this protection even stronger.
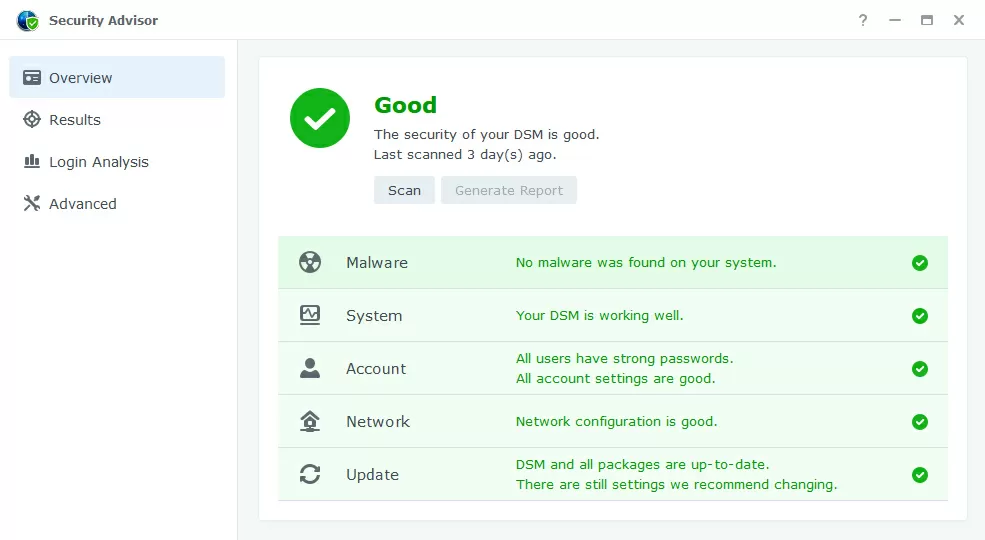
When initializing the NAS, the latest version of the operating system is downloaded and installed on the device, so that the option of OS obsolescence during the journey from the manufacturer to the customer is excluded. By default, the Security Assistant package is already installed in the system, which can be run periodically to scan the system for vulnerabilities. In our case, when he started, he found that the E-mail notification of new versions of the DSM was not configured, and such trifles are not disabled here in any way, so it will not be possible to cheat for the sake of the cherished 100% security.
1 - disable the Admin account and configure the password policy
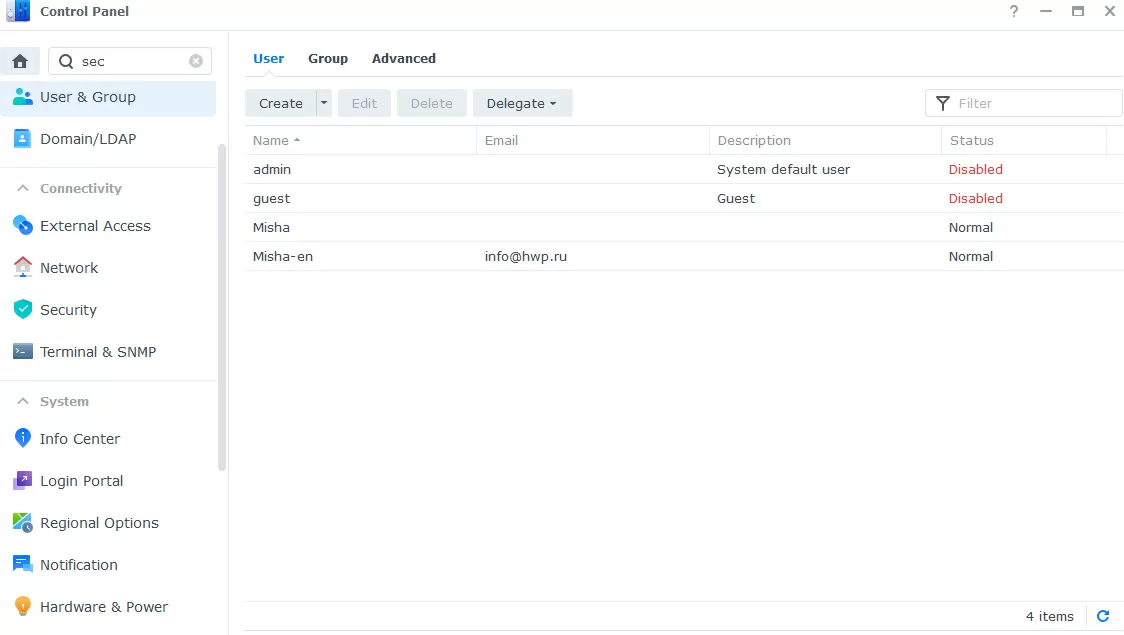
By default, terminal access is disabled on Synology NAS, and the web interface is moved to port 5000. To protect ourselves from the selection of the administrator password, first of all we disable the admin / administrator account, assigning admin functions to the newly created user. In the user settings, you can set a policy for the password, although the default settings are (8 characters of different case + digits + special.symbols) will be enough.
The NAS can integrate not only into the Domain/LDAP domain service, but also act as a single authentication tool so that the user can log in to other applications via Synology, as it is done through Facebook and Google on various websites. This approach allows you to centrally store user credentials and reduce the area of attack for stealing login/ password, even if the breach is present in other, third-party applications.
2 - setting up password-free authentication
Methods of user identification are gaining more and more popularity not through a login / password pair, but through a token, which can act as both a hardware key and a smartphone. Starting with DSM version 7, Synology NAS supports both of these methods. To identify with a hardware key, you will need the NAS to be accessible via HTTPs via a domain name, for example nas.yourdomain.com which is not always possible and desirable. Identification via smartphone does not even require a "white" IP address, and works through the built-in Synology QuickConnect domain name system.
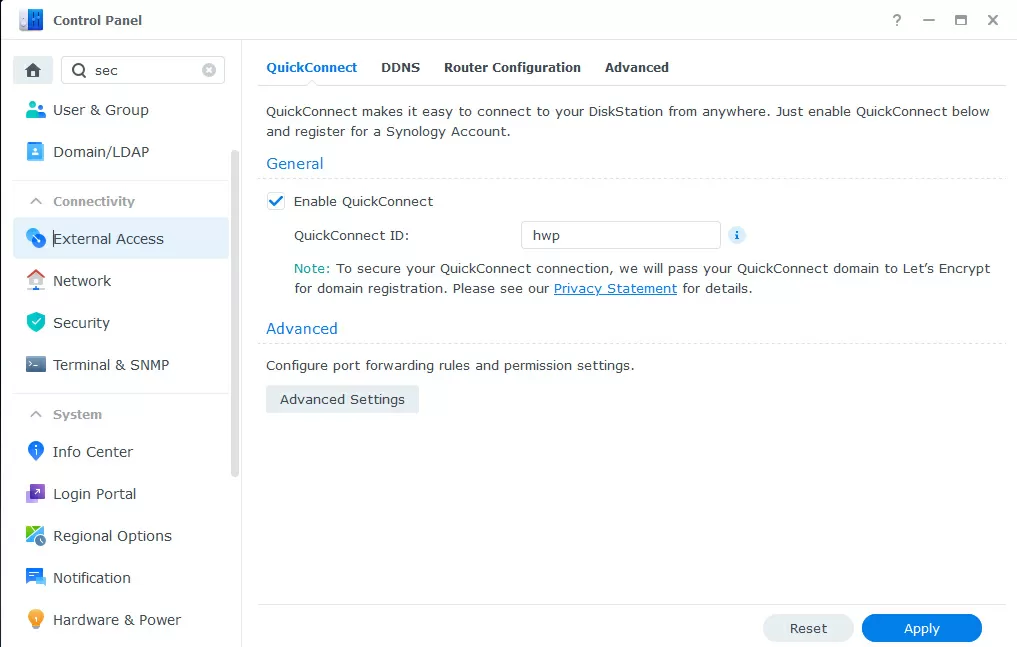

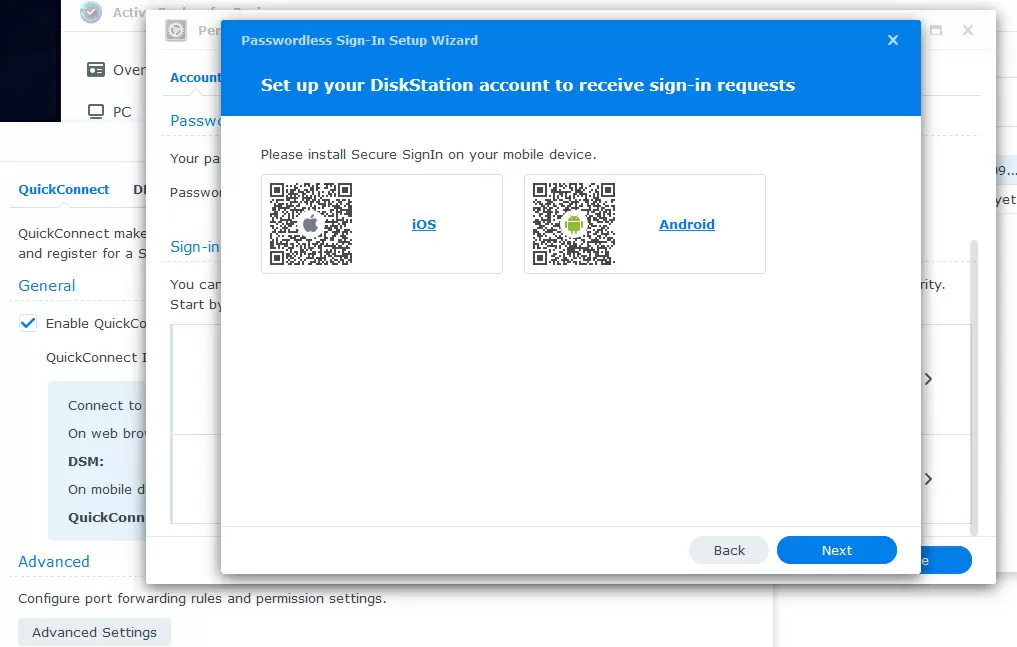
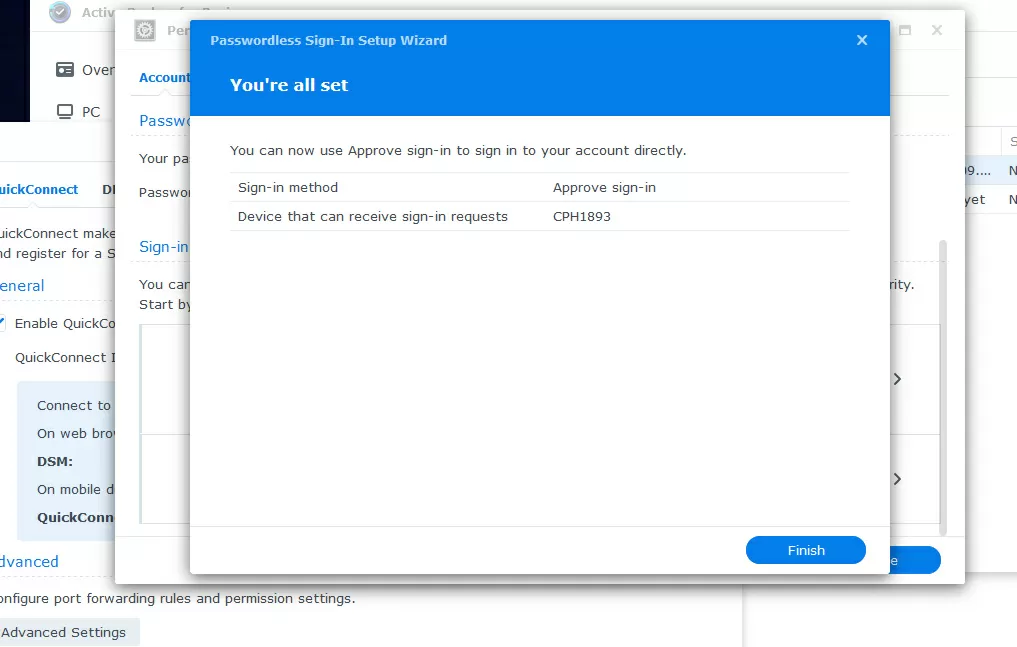
The setup is simple: all we need is to install the Synology Sign In program on the smartphone of the desired user, and enable password-free login in the user properties. After that, we scan the generated QR code from the application, confirm it in the NAS settings - and that's it. Now, when you try to log in to the NAS, you will only be asked to enter your username, after which a notification will be sent to your smartphone asking you to confirm logging in to the device. But the possibility of authentication by entering a password from the keyboard remains as a backup option in case the smartphone is discharged / lost, etc.
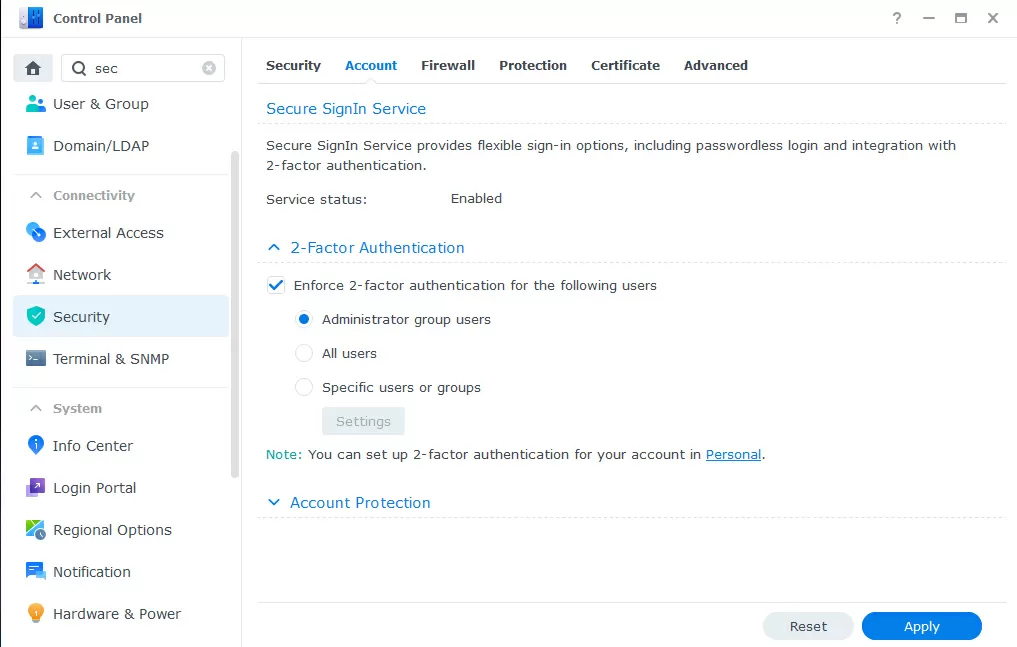
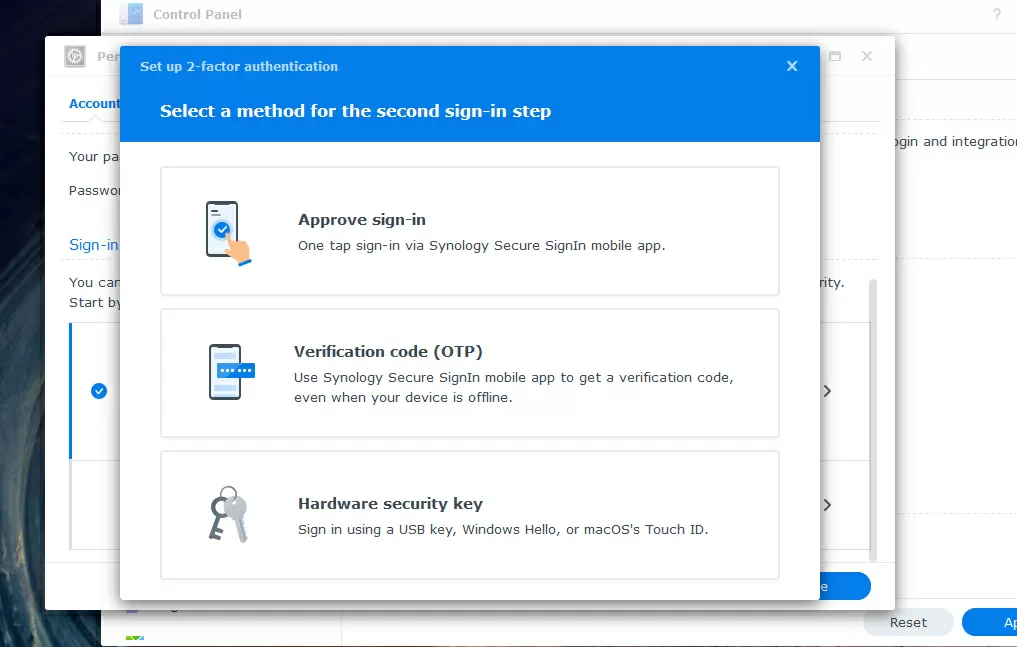
2а (optional) - setting up two-factor authentication
Two-factor authentication is implemented by the Synology Sign In application, and is an alternative for password-free login. To configure, all the same steps are performed as described in the paragraph above, with the only difference that instead of confirming the password, the smartphone application generates a 6-digit code that must be entered in addition to entering the password when accessing the web interface. In case of a breakdown / loss of the phone, you should specify an E-mail for emergency access recovery.
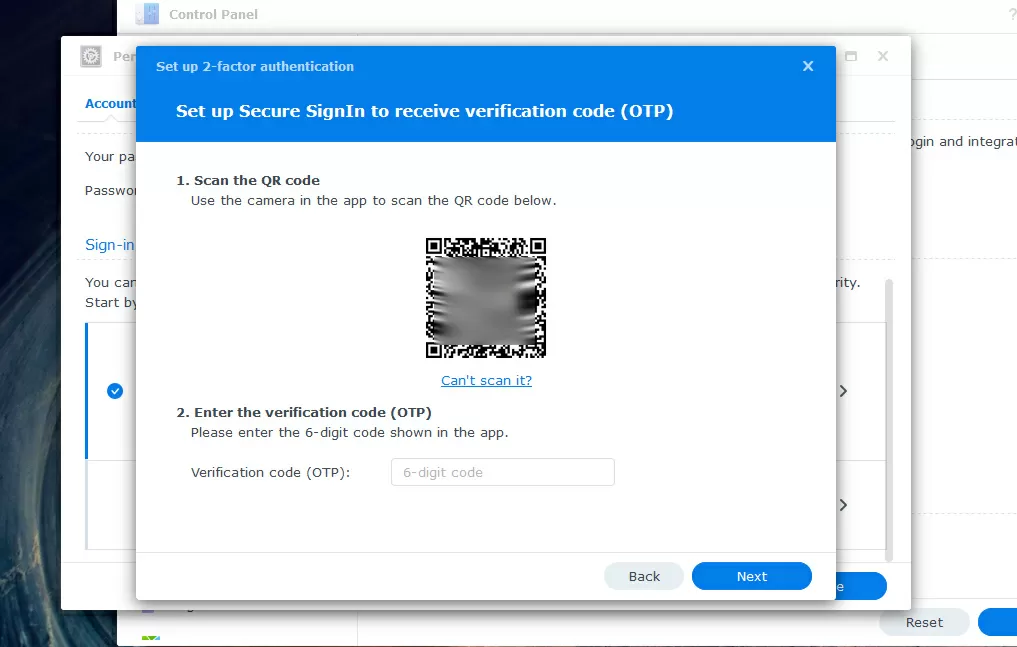
For some trusted devices (personal laptop, work computer), you can disable OTP code verification. By the way, to generate OTP codes, you can use the Google Authenticator program instead of Synology SignIn: in the same way, scan the invitation QR code and simply add Synology DSM to your other services (Internet banking, login to your personal account, etc.): damn convenient.
Two-factor and password-free authentication work only within the Synology Web interface: this is useful for embedded applications such as Web mail, calendar, office suite or chat. Yes, all this can be run within a single NAS, which will save you from dependence on Internet services. However, the file and terminal access protocols remain dependent only on the login/password pair, so brute-force protection remains an important step in setting up security.
3 - enabling password brute force protection
This option is disabled by default, but Synology offers two levels of protection. The first is the temporary blocking of the account itself, which is under attack. This is the most environmentally friendly type of protection, because if an attacker uses the IP addresses of your subnet or the subnets of your clients, the operation of the services will not be affected.

It is also possible to block the attackers' IP addresses in the old-fashioned way, for which we open the control panel -> security -> protection and enable IP address blocking with 10 erroneous logins for 5 minutes. Deleting the blocker's IP address can be done in 1-2 days, and here it also makes sense to add local subnets or trusted IP addresses to the white list to exclude their blocking, when, for example, the malware aims to specifically block the host by performing a keyless bruteforce NAS.

On the same tab, you can enable protection against DoS attacks without any additional settings.
4 - we use the built-in Firewall
Synology's top-end rack-mounted NAS supports the functions of forwarding a network port to a virtual machine running on the NAS via Virtual Machine Manager. For some special situations of infrastructure deployment, I recommend simply installing pfSense or OPNsense into the virtual machine so that you can use globally recognized network security software, but if there is no such possibility, the built-in Firewall should not be discounted.
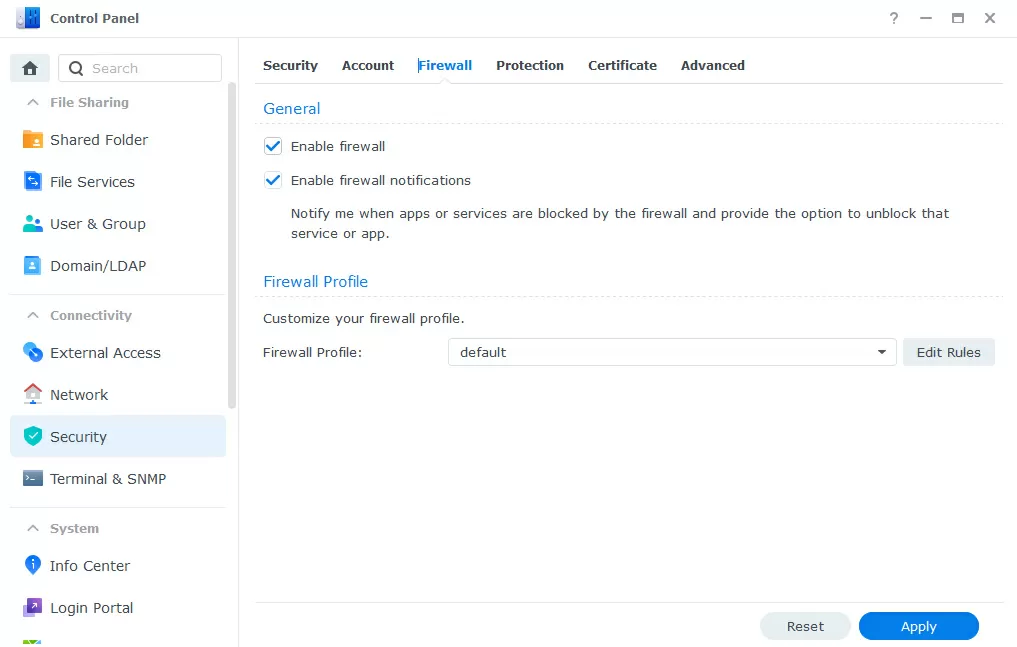
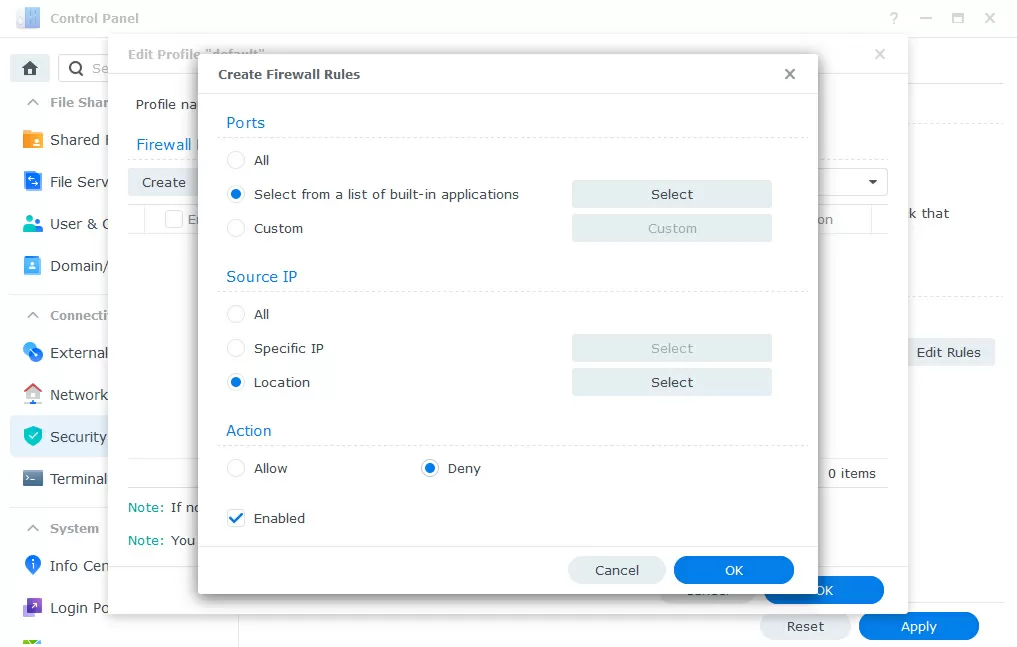
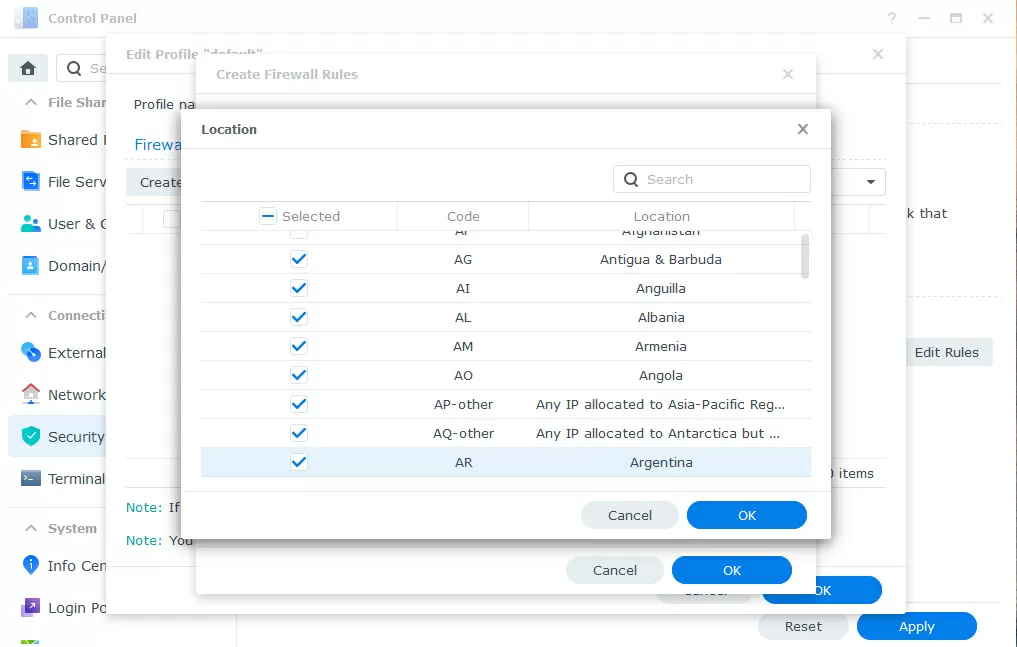
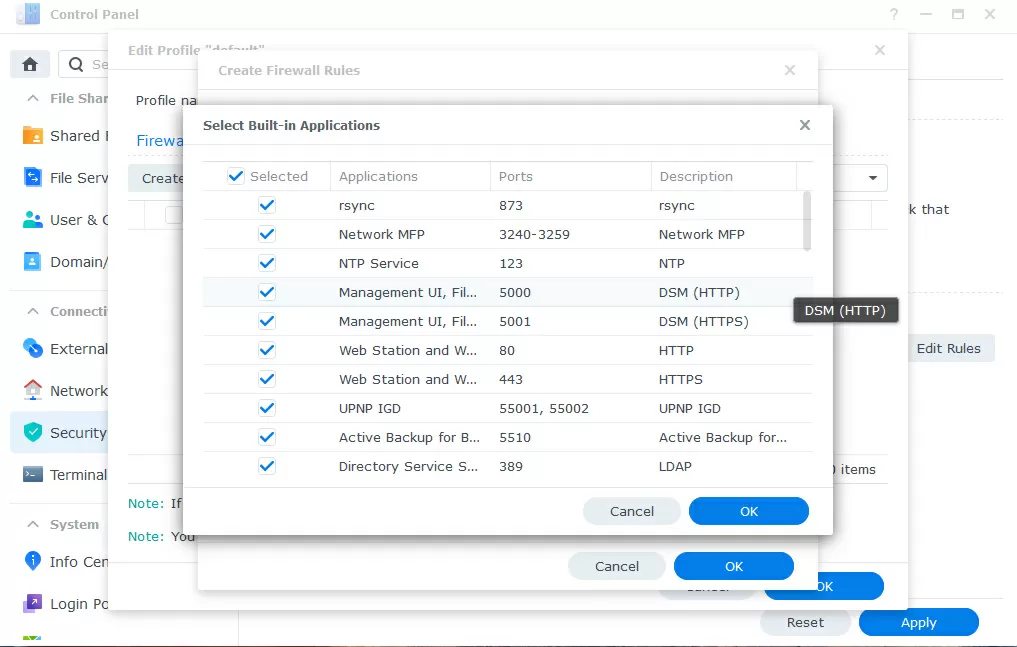
By default, it is disabled, and in just a few clicks you can close access to the built-in NAS services from regions in which you have neither employees nor customers. All ports used by the services have already been registered, so we select all services, and forbid them access from Antarctica and some other countries, for example.
5 - setting up OpenVPN
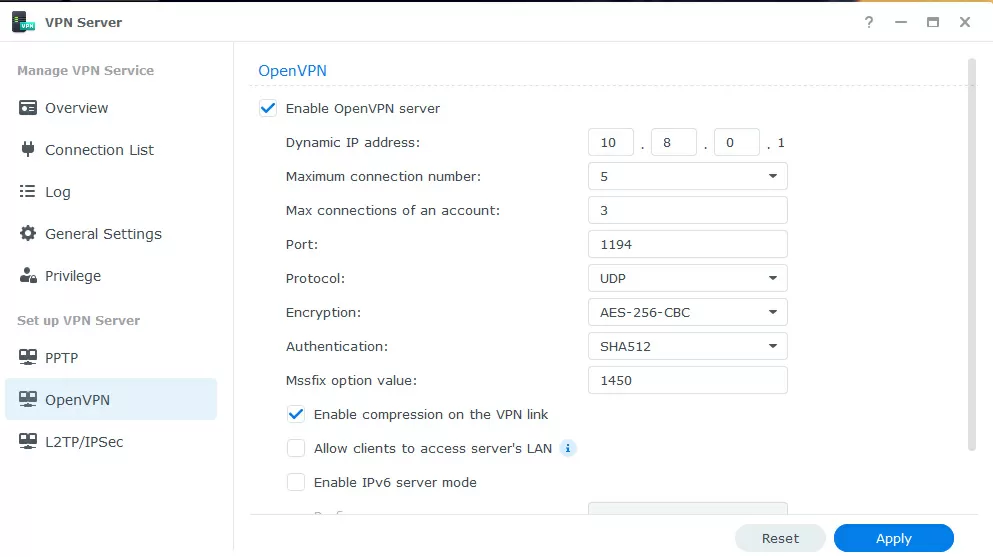
In general, VPN tunnels are usually implemented using software or hardware access gateways, but each Synology NAS can act as both a client and a VPN server: without dependence on third-party software, without licenses and complex command-line settings. We recommend that you wrap external traffic via VPN as much as possible, even if the connection is encrypted. In the northern part, outdated PPTP, fast and efficient L2TP/IPsec and universal OpenVPN are supported, which can be used not only over UDP, but also over TCP transport. For maximum security, it makes sense to change the standard port 1194 to an arbitrary one.
The VPN client is configured in the Network connections section, and three types of tunnels are also available here: PPTP, IPsec and OpenVPN. The latter is configured by importing .ovpn file, without manual settings.
6 - encrypting Data at Transit to protect against sniffers
The concept of Data at Transit covers any data that is literally in wires or in the air, that is, transmitted between devices. Until quite recently, data was not protected in this area, because it was believed that the intranet was a secure network. Probably for this reason, in Synology DSM, "in-flight data" is not encrypted.
6а - enabling file protocol encryption
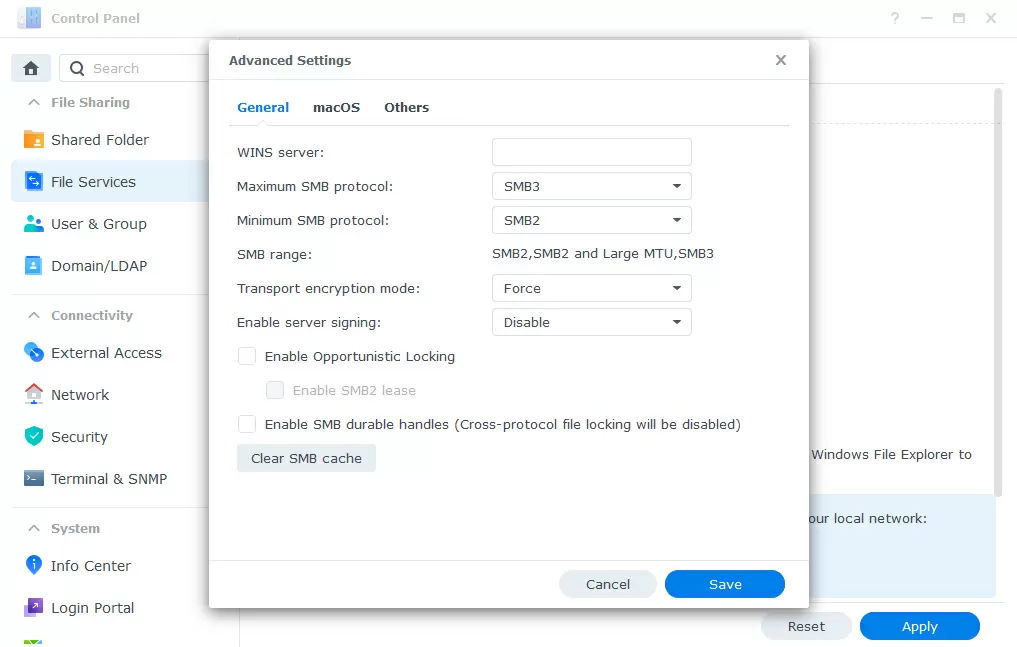
The Samba (SMB) or CIFS file protocol, which is used to connect shared network folders from the NAS to computers running Windows and macOS, supports end-to-end encryption of each request. Windows Server 2022 and Windows 11 use AES-256-GCM and AES-256-CCM cryptographic protection packages for SMB 3.1.1 encryption. Windows will automatically negotiate this more complex encryption method when connected to another computer that supports it. In addition, this method can be made mandatory by using in Group policy.
Windows 10 and Windows Server 2016/2019 still support AES-128-GCM and AES-128-CM for SMB 3.0 protocol.
Modern processors on which Synology NASS are built support hardware acceleration of encryption operations, so the impact on performance is minimal.
Please note that the AFP protocol for Apple computers does not support end-to-end encryption, it is disabled by default and nothing needs to be touched here: Apple computers do an excellent job using the SMB 3 protocol.
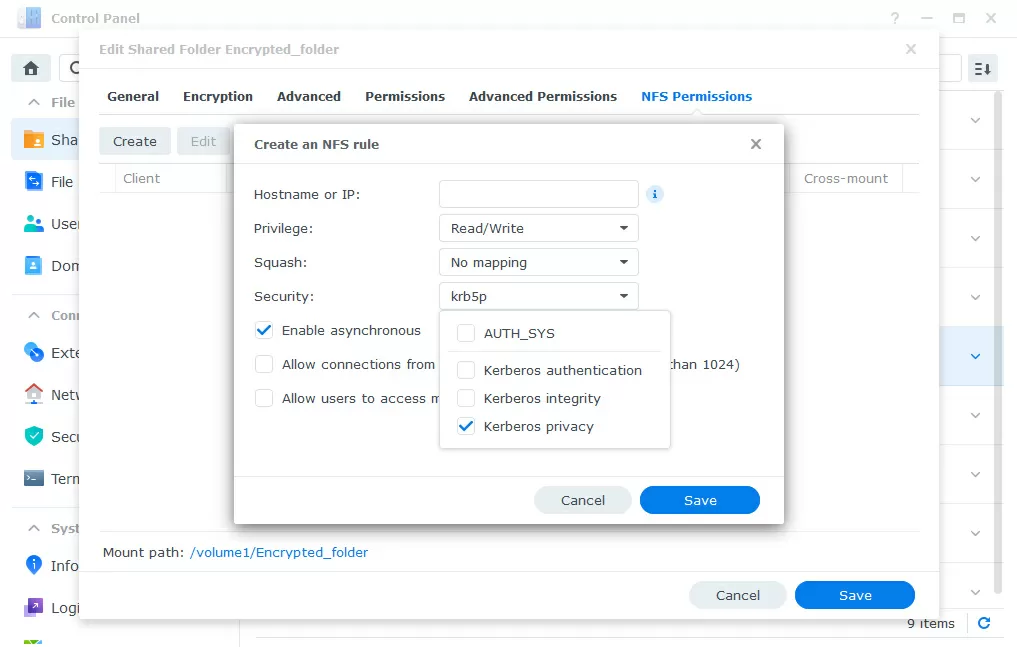
The NFS protocol, often used for Linux clients and VMware ESXi hypervisors, is also not encrypted by default. This parameter is configured individually for each folder and IP address range in the NTFS Permissions tab. Here you need to create a specific rule in which you must select the Kerberos privacy field and disable the AUTH_SYS authorization type. After that, you need to import the Kerberos keys common to the entire NFS service.

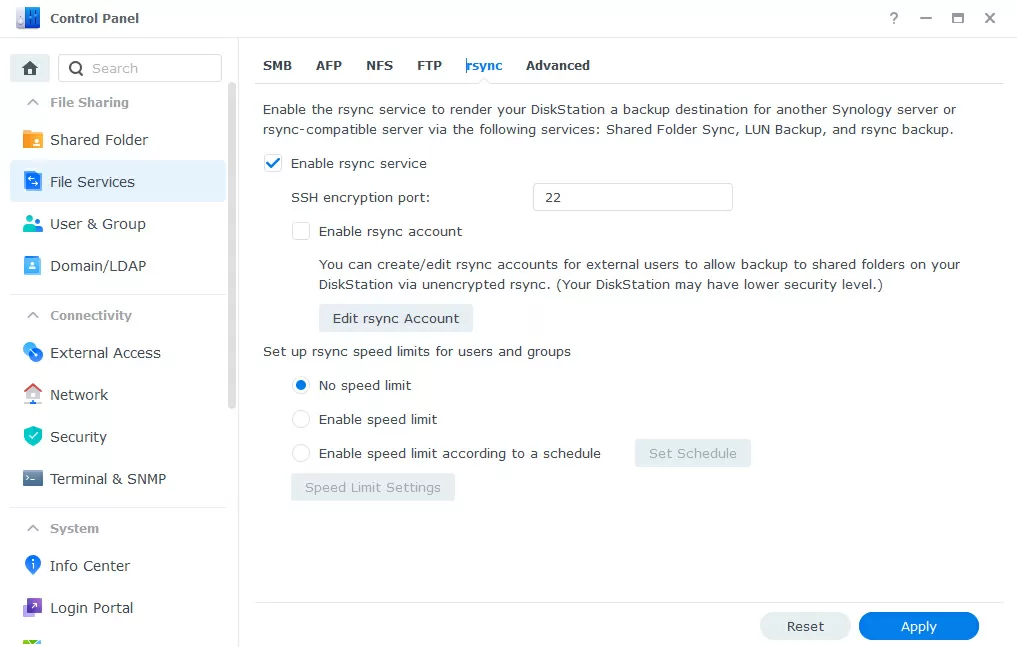
For file exchange with simple devices, we enable FTPs (encryption over FTP) and SFTP (data transfer over an encrypted SSH tunnel), and in order for your NAS to act as a means of storing backups from other Linux devices, we enable the RSync protocol, which also works over SSH. Everything here uses encryption by default, and no settings need to be made.
Please note - enabling RSync and SFTP does not mean enabling terminal access via SSH, and if the latter is disabled and the first two are enabled, then when connecting via the terminal, the connection will be terminated.
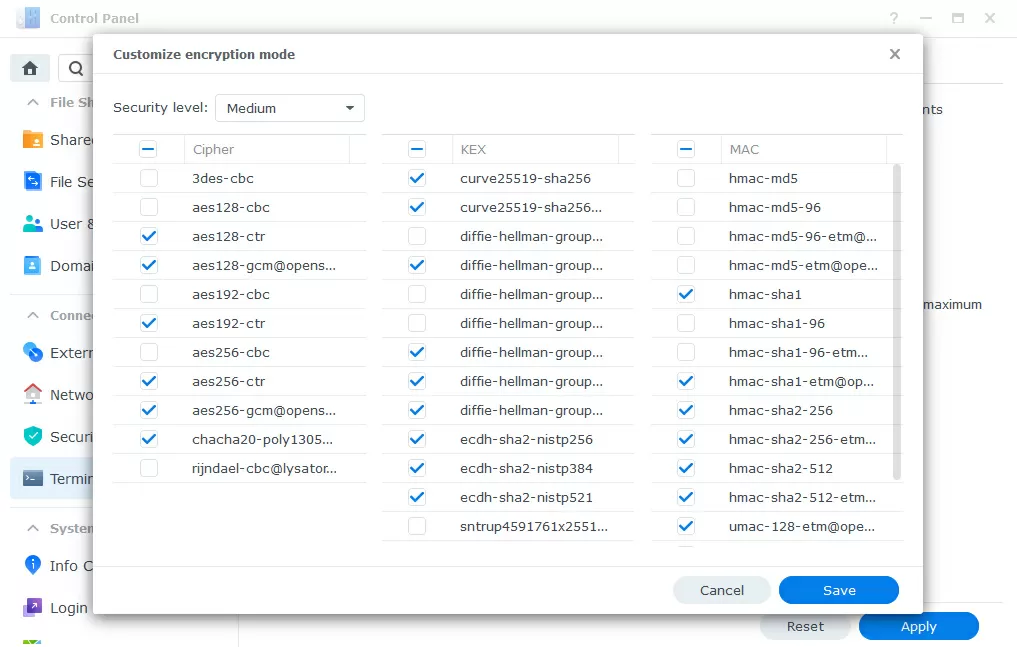
In general, you probably won't need SSH access, and you don't have to turn it on, but if you still need it, you will be offered a huge selection of traffic encryption algorithms in the security settings. I recommend disabling support for 128-bit keys, leaving 256-bit and higher.
It remains only to configure access rights to shared folders to exclude the possibility of access from a guest account, and almost everything is finished.
7 - getting a certificate for HTTPs
The final touch will be to receive a Let's Encrypt certificate for the correct operation of the device's Web interface via HTTPs. To do this, on the local network, you need to configure access to the NAS through the domain, so that the NAS responds to requests on 80 and 443 ports, for which you can use a subdomain of the 3rd level of the form nas.mycompany.com . You can create a self-signed certificate or import an existing one.
Practically, this is where the protection of "data on the fly" can be considered over, and it's time to move on to the most important, from my point of view, configuration element.
8 - encrypting Data at Rest to protect against theft / seizure
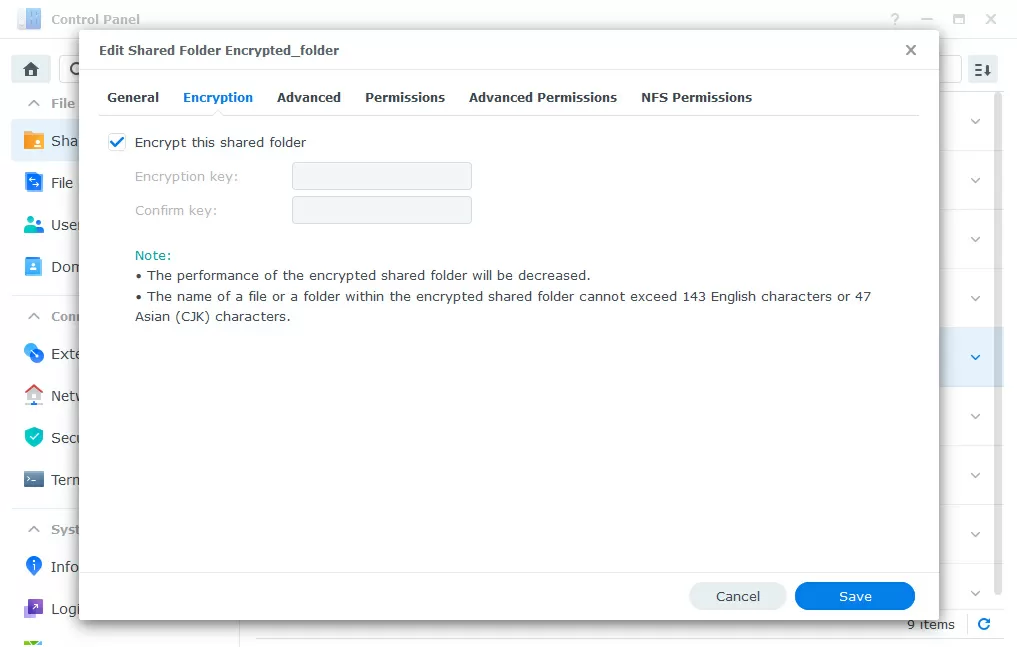
"Data on rest" refers to all the information on the drives, regardless of whether it is in the cache or in storage, it is often requested or rarely. Here Synology offers encryption of shared folders according to the AES-256 standard, using the eCryptFS file system on top of BTRFs or EXT4, in which each file is encrypted individually. The durability of the protection is confirmed by the FIPS 140 certificate, and encryption is configured individually for each shared folder at any time, including after creation.
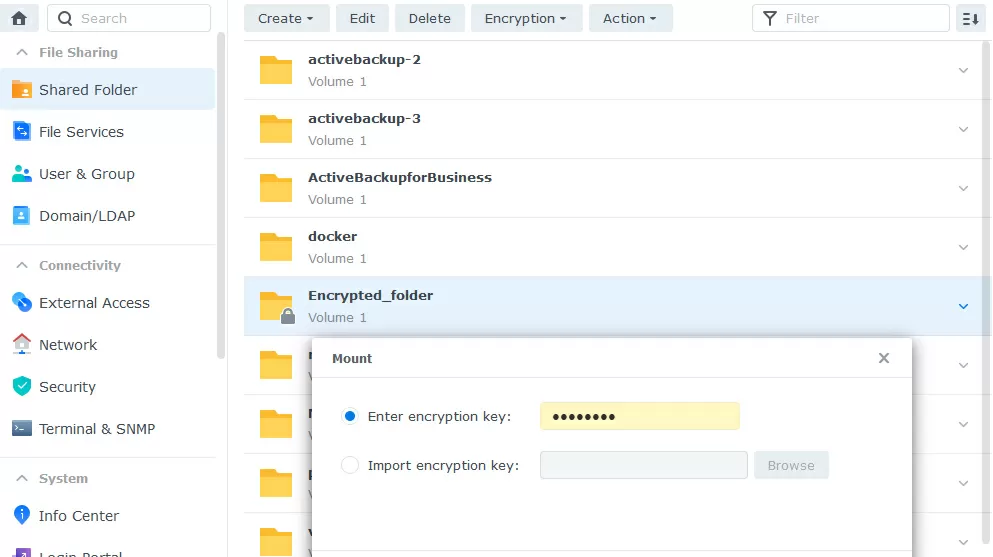
This protection helps with physical theft of NAS or drives: every time the device is rebooted, the shared folder is in an unconnected state, and in order for its contents to be accessible, you need to manually mount it by entering the encryption key.
If you go through the terminal to an unconnected encrypted folder, its contents will look like this:

Data compression is not available for an encrypted folder, and some services, such as Active Backup or Virtual Machine Manager, cannot use it as storage. As for the good news, snapshots are supported on such folders (although they cannot be viewed), and hybrid folders that are used as a cloud drive on laptops and smartphones can also be encrypted.
Question: What to do with iSCSI?
Synology DSM does not support iSCSI LUN or connection encryption, although both are technically possible. Since block access is provided by iSCSI, the best thing you can do to protect data both on the fly and stored on the device is to encrypt disks located in the LUNs using the operating systems to which they are connected (BitLocker or VeraCrypt for Windows and LUKS or ZFS for Linux). In this case, the data will be reliably protected even in case of traffic interception or access to the NAS at the physical level.
9 - Data at Work protection
Previously, we have sufficiently protected all of Synology's own services running on the NAS, but now it's time to take care of third-party programs that you can transfer to the Virtual Machine Manager hypervisor. In NAS-s built on the basis of Intel processors, the danger of exploits Meltdown & Spectre remains, thanks to this, an infected virtual machine can access data in the memory of another virtual machine. To prevent this possibility, Intel has made changes to the processor microcode that seriously slow down random read operations from the disk subsystem.
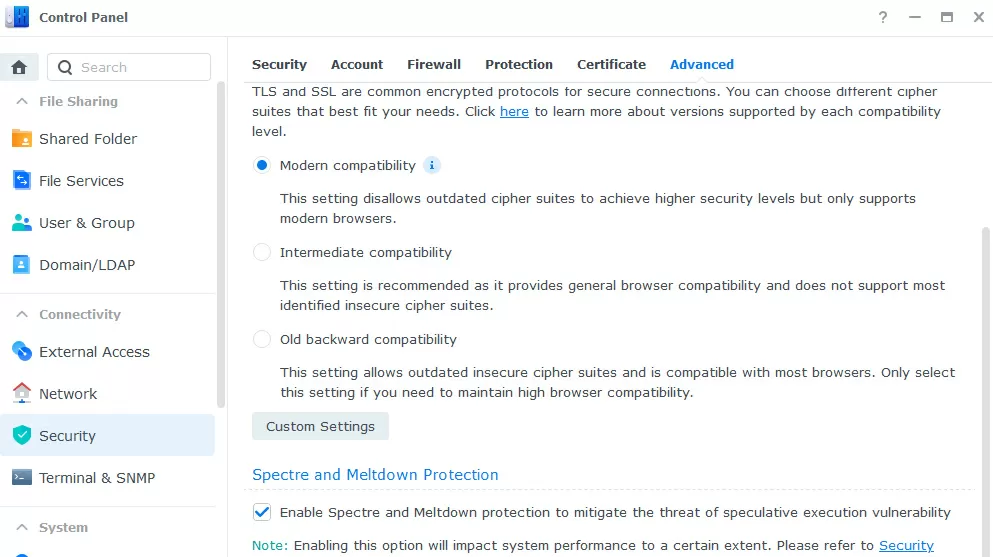
In Synology DSM, Meltdown and Spectre protection is disabled by default, because not even every hypervisor requires it, and speed is significantly affected. If you plan to allow users to run their own code in virtual machines hosted on Synology, then go to the control panel, to the Security - Advanced tab and enable protection against Meltdown and Spectre. If you know for sure that no one will run any third-party programs within the virtual machines, you don't have to do this.
10 - protection of archived data
Let's look at the encryption of various backups that can be stored on the NAS. Since Synology DSM consists of a core and applications, one application (Snapshot Replication) is responsible for snapshots, another (Hyper Backup) is responsible for backups between NAS or to the cloud, and a third (Active Backup for Business) is responsible for reserving servers, virtual machines and workstations. Accordingly, each of the applications has its own protection mechanisms. Let's start in order:
Encrypted data is also stored inside the encrypted folder snapshots, so even when replicating to a remote server, it is impossible to open the data without a key. You can't view the contents of snapshots of encrypted folders, which of course complicates the task of "pulling out the right file for yesterday. Unencrypted folders have unencrypted snapshots, but you can encrypt data when replicating to a remote server to protect against interception. The key is set only for the folder itself at the stage of its encryption.
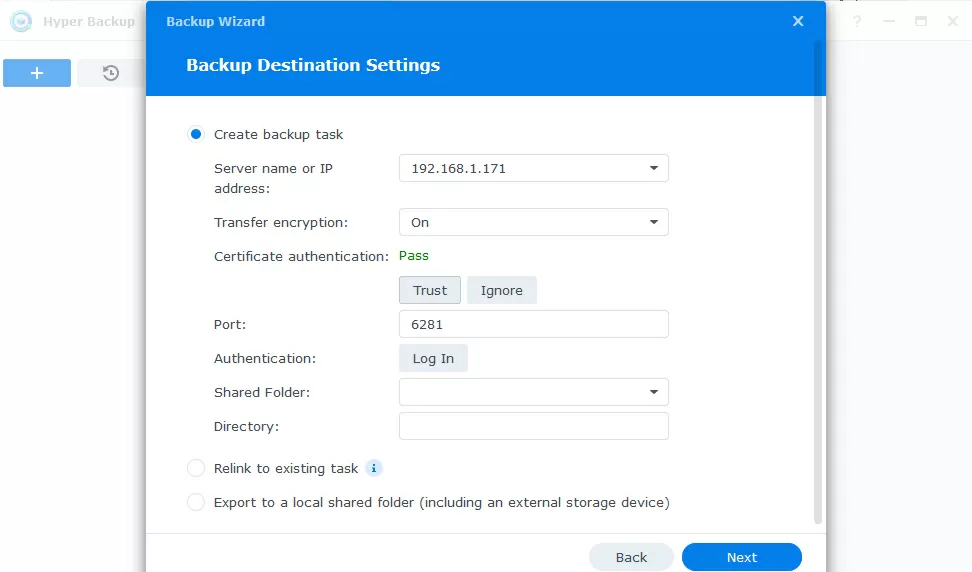
Backup of the contents of the NAS itself to another NAS or to the cloud using the Hyper Backup program supports encryption both during transmission and for storage. The key is set once for the backup task, that is, you may have different passwords for saving data in Google and on Synology C2.
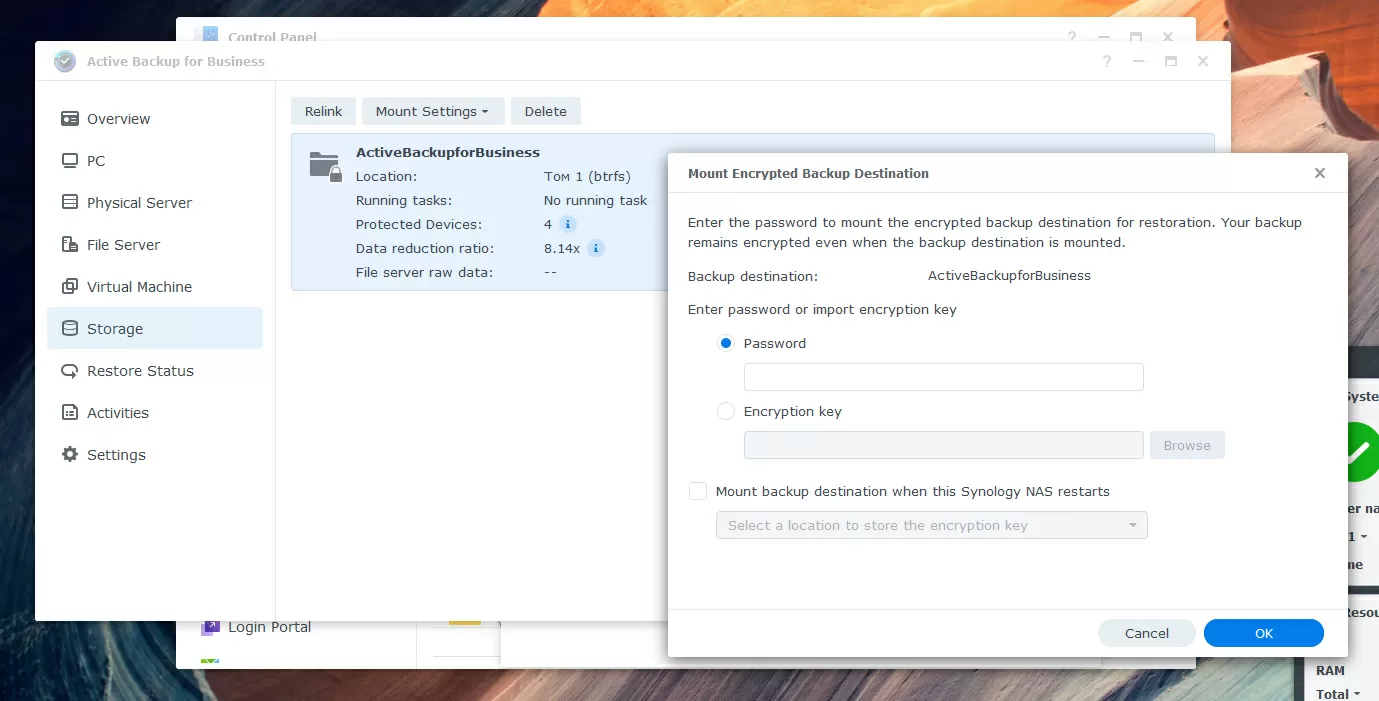
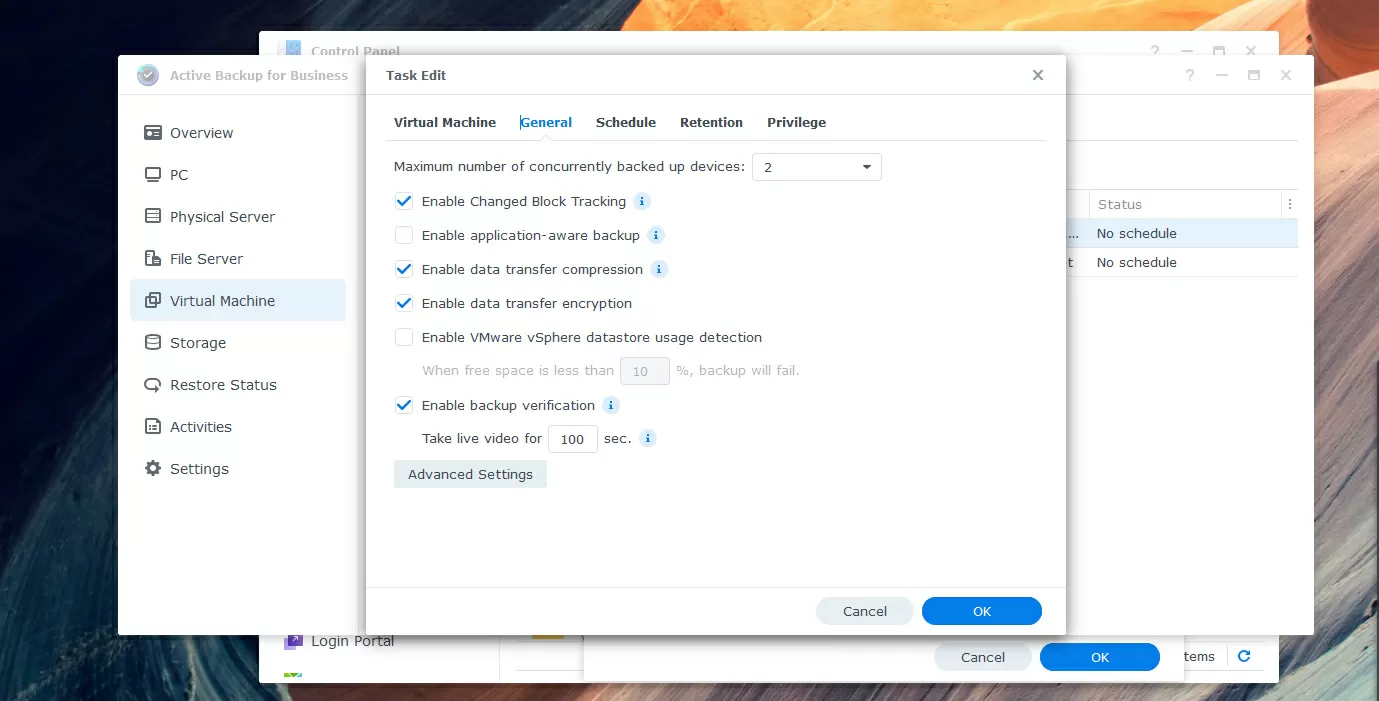
In the Active Backup for Business backup program, encryption is implemented in the most convenient way: each backup task can use its own storage (a top-level folder on a disk volume), which does not have to be mounted at all so that it can be backed up. Yes, you can create new tasks or delete old ones using an encrypted folder, the key to which only your boss knows. Convenient, right? And there can be as many such folders as you want, you can mix encrypted and unencrypted storage. Well, you will have to connect an encrypted folder by entering a password when restoring a backup or for automatic verification of the integrity of copies. By the way, in the storage settings, you can enter the auto-mounting of the encrypted storage and specify on which partition the NAS should store the encryption keys, loading them after the reboot, but I do not advise doing this.
Final touches
At this stage, we have protected our Synology NAS as much as possible from DoS attacks, attempts to pick up a password, password theft by a keylogger or other malware, physical theft of the entire device or its disks, as well as from sniffers of all stripes. With proper configuration of privileges for access to shared folders, the NAS turns into an impregnable safe, which even Synology specialists cannot open. It remains to protect yourself from the most terrible problem - from the human factor.
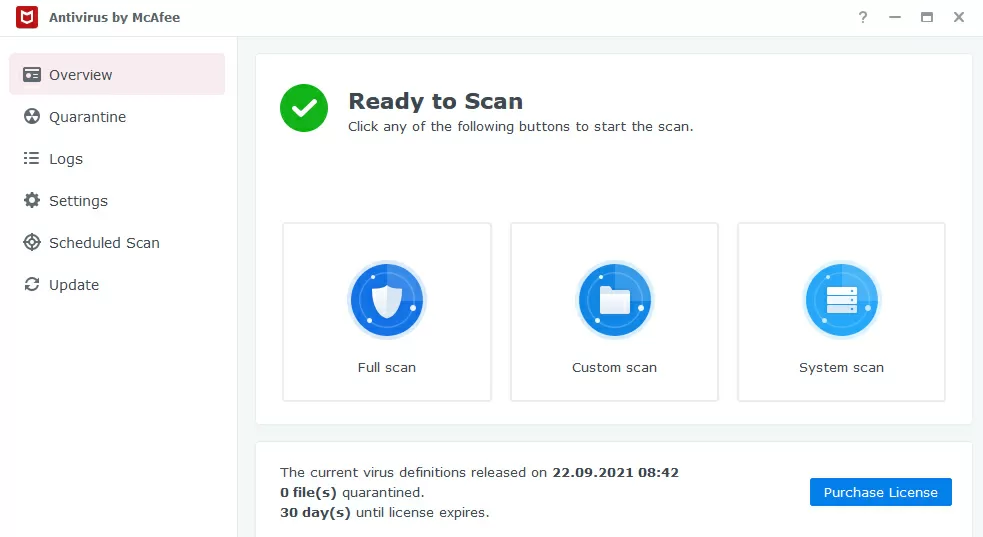
First, we configure antivirus scanning of the NAS internal space with a free Antivirus Essential package, or with a paid McAfee Antiviens. Both solutions are approximately identical in parameters, and we also enable weekly scanning of security settings by the Security Advisor tool.
Secondly, we configure the backup of the entire NAS to the Synology C2 cloud service. It's cheap, practical, convenient, and plus Synology doesn't sell your data to advertisers.
And I recommend paying attention to the Note station application for saving notes on the NAS: here it is possible to use encrypted notebooks, which is useful for storing settings, passwords and just secrets. Do not forget to include Note Station in the list of backups in the HyperBackup program for backup to the cloud, but in order not to forget encryption passwords, Synology offers to use its own cloud service C2 Password.
Michael Degtjarev (aka LIKE OFF)
04/10.2021