Adder ePowerSwitch 8M - server rack power management system
Often speaking about KVM switches and various devices and hardware and software solutions for remote control of computers, we highlight the ability to work at all stages, starting with boot, when you can remotely enter BIOS Setup or remotely send reboot the machine without fear of losing control before Windows boots. In this respect, KVM devices are far superior to purely software remote administration tools, but alas, if the computer or KVM switch , as they say, `` hangs '', then even the full functionality of the keyboard will not be enough, you need the functionality of the on/off button, or even better - & ndash; functionality of 'evil' unplugging the power cord from the outlet. Of course, it's a joke about the administrator, but it would be very nice to control the power remotely, and for this there is a class of devices. We were lucky enough to get acquainted with one of the most convenient and technically advanced lines of such remote "switches from the socket", it is 8-channel ePowerSwitch from ADDER .
Appearance, equipment and specifications
If you are explaining to someone what professional grade IT equipment looks like, you can simply show the ePowerSwitch 8M +. This absolutely functional device, made in a steel case for mounting in a standard 19 '' rack, the designers worked hard to ensure that the switch was convenient to mount and use, and not to be beautiful. ePowerSwitch 8M + is designed just so that the administrator has less opportunity to contemplate it, i.e. visit the server room only in very emergency situations or to install new equipment. So, ePowerSwitch 8M + is a black elongated case, equipped with three connectors on the front panel and several indicators.

The head unit (master) (and there are also slaves, about which a little later) is equipped on the left side of the panel with an indicator for the presence of slaves and power, an RJ-45 port for connecting to the network, a serial port RS-232 interface for control from a local PC. In the center of the panel there are indicators of the presence of power at the input for groups of connectors A and B (4 connectors in a group), as well as the states of each of the 8 power outputs - those on are indicated by green light, off - by red. Another RJ-45 connector is located to the right of the indicators; it is intended for cascading, i.e. ePowerSwitch 8M + (the M after the figure eight stands for Master) of the ePowerSwitch 8XS (S stands for Satellite = slave). Using cascading, we add 8 more ports to 8 ports, and in total you can connect 4 slaves, i.e. the total number of controlled outlets will be 40.
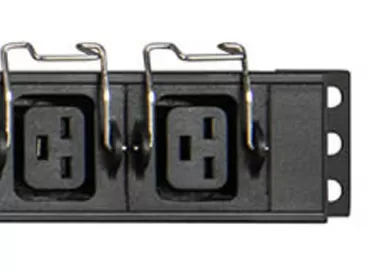
The back side of ePowerSwitch 8M + is equipped only with electrical sockets for computer equipment - there are 4 outputs per input. An additional power input was added to improve the stability of the switch when the load on the device increases, for example, when several devices are turned on at once. Also, in the event of failure of one of the switch power supplies, the devices connected to it will continue to work stably until it is replaced.

There are practically no restrictions on the use of these outputs, only on each group of 4 connectors the total load should not exceed 10A in current strength, i.e. permissible power consumption for a 220V network is about 2200 W. Otherwise, connect whatever you want, from the server to the CCTV camera or TV.
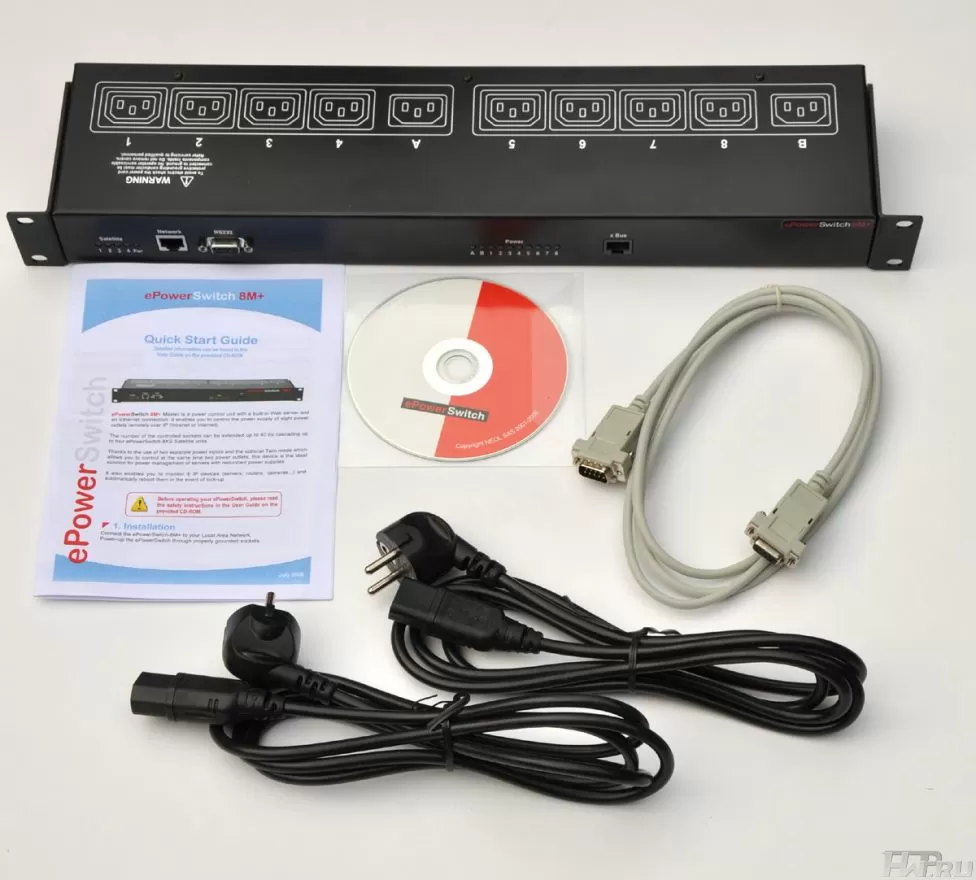
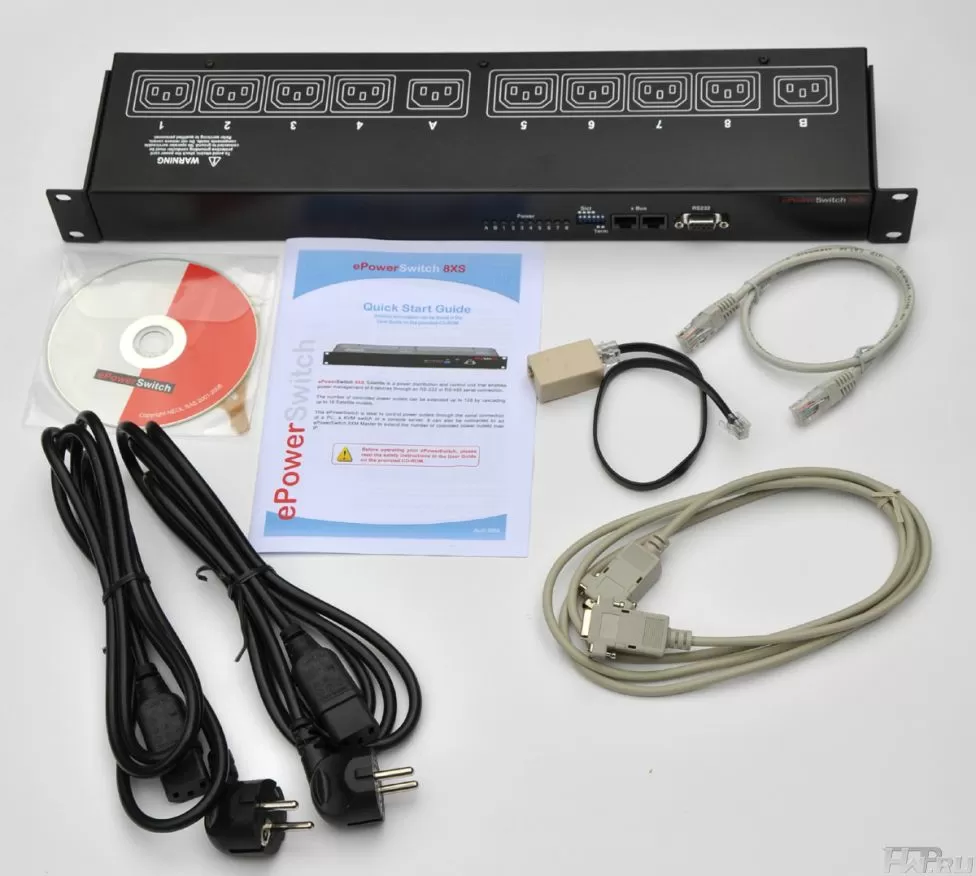
The ePowerSwitch 8M + package is modest. A small but heavy box contains:
- The switch itself, in fact, it is the main burden, since it has a steel case, inherent in all devices offered by the Adder campaign - thus, increased protection of electrical circuits from damage is achieved;
- A pair of power cords that connect the ePowerSwitch 8M + to outlets and distribute power between the 8 outlets;
- Cable for connecting the switch through the RS-232 interface, i.e. standard COM port;
- The printed Quick Installation Guide is English, but well understood, even if you know English very superficially;
- CD with documentation for the entire ePowerSwitch line in PDF format, as well as epsFinder, which determines the address of the switch connected to the network.
|
ePowerSwitch 8M + Features | |
|
Network standards |
IEEE 802.3, 10BASE-T |
|
Network Protocols |
TCP/IP, HTTP |
|
Network Connection |
RJ-45 connector for UTP CAT5 cable |
|
Maximum network cable length |
100 meters, not included |
|
Serial 1 |
RS232, SUB-D 9 |
|
Serial 2 |
RS485, RJ-45 |
|
Input sockets |
IEC-320 |
|
Rated input voltage |
230V/50Hz |
|
Maximum input current |
10 A |
|
Outlets |
IEC-320 |
|
Output voltage |
230V/50Hz |
|
Maximum output current |
10 A |
|
Maximum output current of the entire device |
2 x 10 A |
|
LED Indicators |
1 for power input of port trunk A |
|
1 for power input of port trunk B | |
|
1 for embedded web server and traffic | |
|
8 for output sockets | |
|
4 for connected satellites | |
|
Allowable temperature range |
from 0 ° C to + 40 ° C |
|
Allowable humidity |
from 10% to 80% |
|
Dimensions (WxDxH) |
437x107x42 mm |
|
Mass |
2 Kg |
|
Compliance |
CE, EN55022 & amp; EN55024, RoHS |
|
Warranty |
2 years |
Perhaps, before proceeding to connection and use, it is worth explaining what kind of slave devices are, and how they differ from the head ePowerSwitch 8M +.
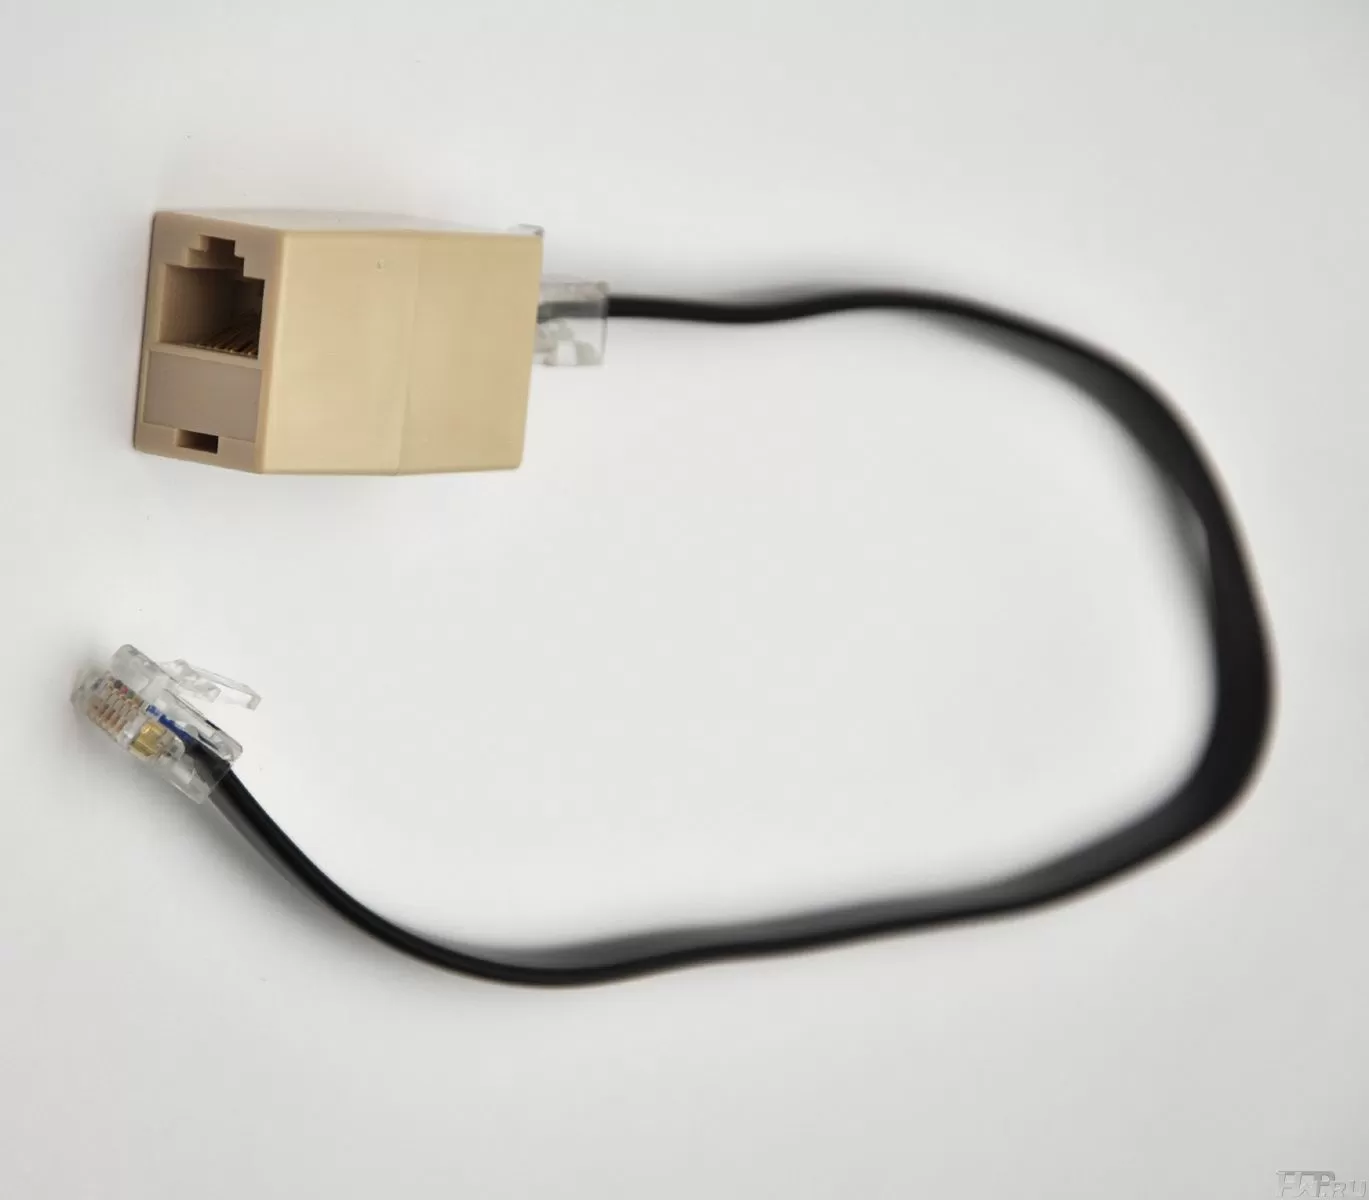
The delivery set, as you can easily see, is about the same, only 2 cables were added for cascading. This is a short patch cord and adapter that allows you to use a 6-core cable instead of using 6 out of 8 wires in a standard twisted pair:
The front panel of the ePowerSwitch 8XS is equipped with indicators only for sockets, but RJ-45 ports for cascading not 1, but 2 - one interface connects the head unit or the upstream slave (up to 4 slaves in total), the second is the downstream power management device. There is also a group of DIP-switches that allow you to set the satellite number, you need to make sure that there are no two ePowerSwitch 8XS connected with the same set numbers - the system will not work in this case.

The reverse side is about the same as that of the ePowerSwitch 8M + head unit, two input sockets and 8 output sockets - 4 in a group.

And finally, the bottom side is the same, except for the sticker with the model name and country of origin - nothing. By the way, ePowerSwitch 8M + and ePowerSwitch 8XS are made in France, a real balm for those who are upset about the dominance of Chinese products.

Actually, this is all the information you can get without including these remote power control devices, so let's move on to connect and use.
Connecting and using
In order to use the capabilities of the ePowerSwitch system, it is enough to connect the ePowerSwitch 8M + head unit to two sockets, the controlled equipment - to 8 outputs, if there are ePowerSwitch 8XS slave devices, then connect the first of them to the head unit, the second (also if there is one) - to the first, the third to the second and the fourth to the third. We connect the head unit to the local network, this completes the installation - you can control the power from any workstation located in this network, or, if there is such a possibility (for example, a VPN), via the Internet in general from an arbitrary point in the world. If for any reason the network is not suitable, you can use the serial interface - connect the ePowerSwitch 8M + via a COM port, but this is most likely a very rare case.
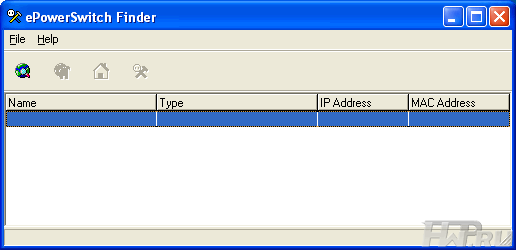
Of course, some kind of interface is needed for management, and ePowerSwitch 8M + has a built-in web server, which eliminates the need to have some kind of specialized software in the workplace where the management is from. Nevertheless, there is a utility on the included disk, it allows you to find the ePowerSwitch on the network, even if you do not know its IP address or it is on the wrong subnet from the administrator's workstation. The program is very simple, called epsFinder, and looks like this:
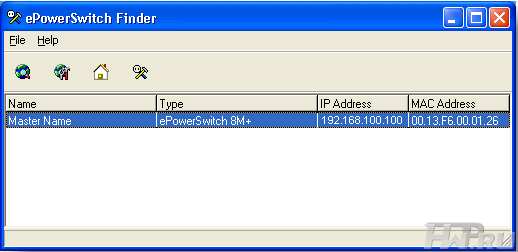
When the ePowerSwitch is found, its IP and MAC address is displayed.
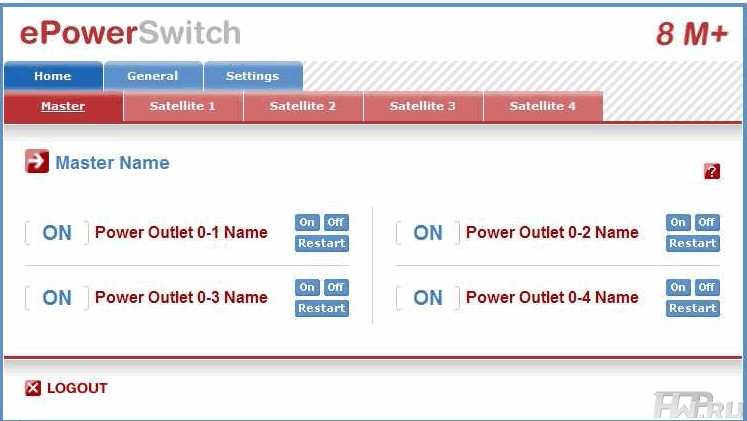
By typing the switch IP address in the browser and entering the username and password (it is better to change the default values the first time, after all, power is a serious matter) we get access to the system management web interface.
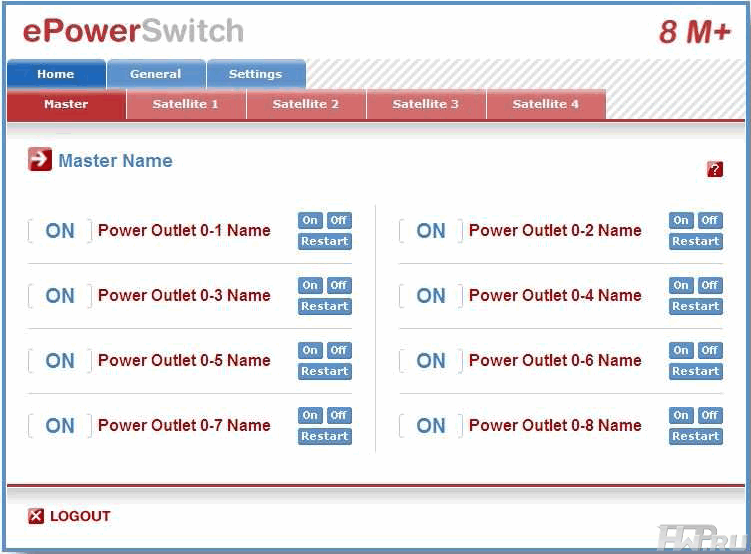
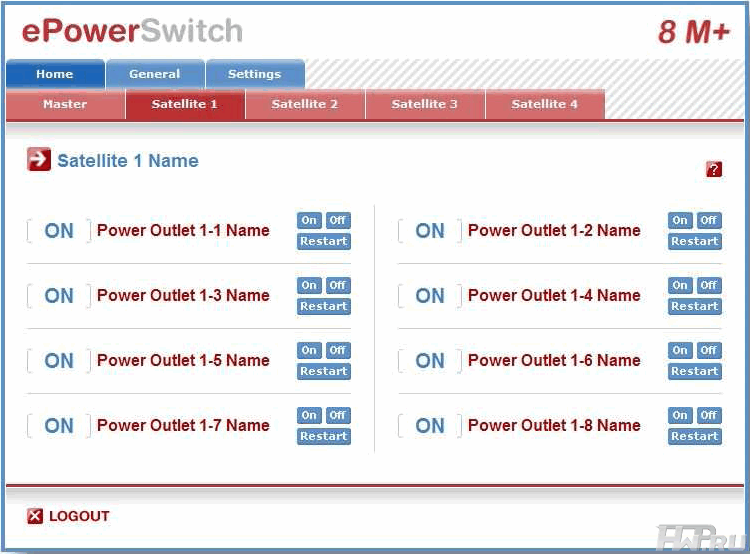
The first page contains buttons for controlling the sockets. For each of them, to the left of the name, the current status is indicated, and to the right - buttons for switching to the "on", "off" mode and the "Restart" button, which provides restart, i.e. turn off and then turn on. It's on the Master tab, for the ePowerSwitch 8M +. On tabs for satellites, i.e. corresponding to ePowerSwitch 8XS devices - everything is exactly the same, 8 outlets that can be controlled.
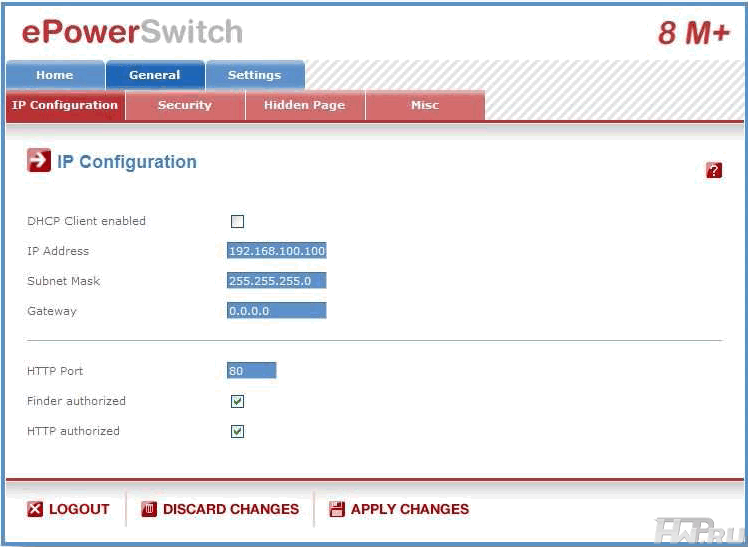
On the IP Configuration tab, in the General group, set parameters such as IP address, subnet mask, port, etc. - you can set such parameters so that access to the system is only from where it is necessary.
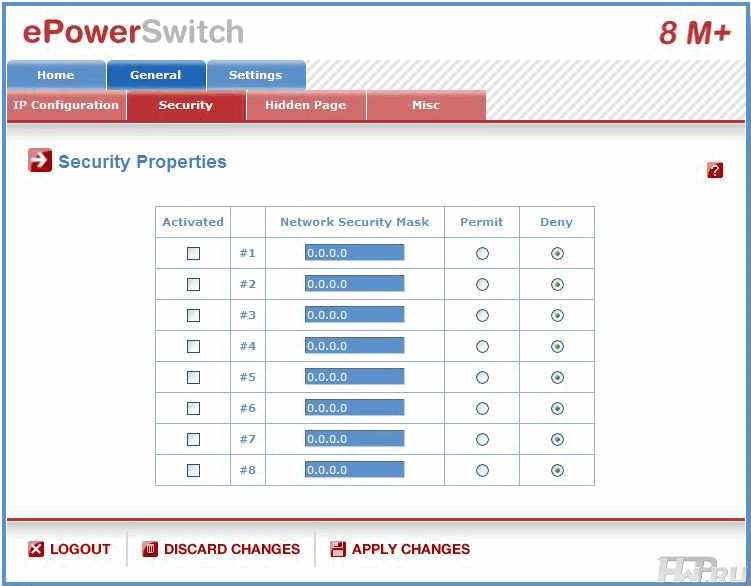
The Security tab allows you to explicitly set addresses and restrict access:
The next tab, mysteriously called Hidden Page, i.e. The Hidden Page (almost the Chamber of Secrets) is one of the most interesting features of the power management system, or rather, its web interface.
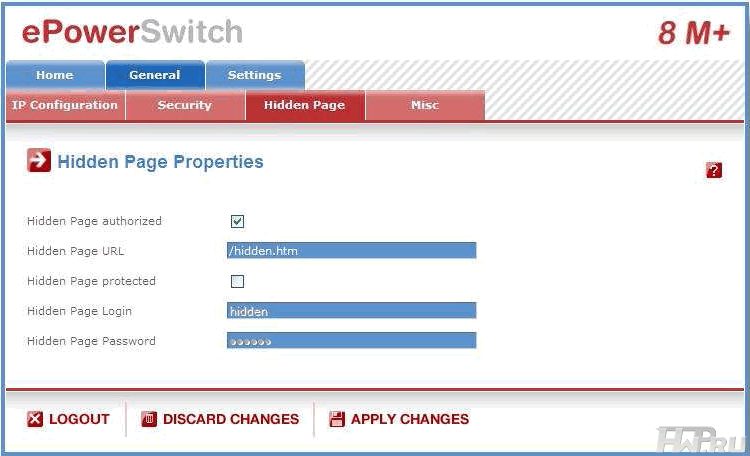
This page is intended for programmers who want to use ePowerSwitch power management capabilities in their applications. The user manual describes in sufficient detail and clearly the syntax of commands that the system understands, for example, a construction of this type HTTP://[IP Address]/[Hidden_Page_Name.htm]? [Pxy = z] & amp; [Pxy = z] & amp; [Pxy = z] transfers the Pxy sockets (xy is the socket number) to the z state; this can be “on” (z = 1) or “off” (z = 0), or you can force the outlet to “overload” (z = r).
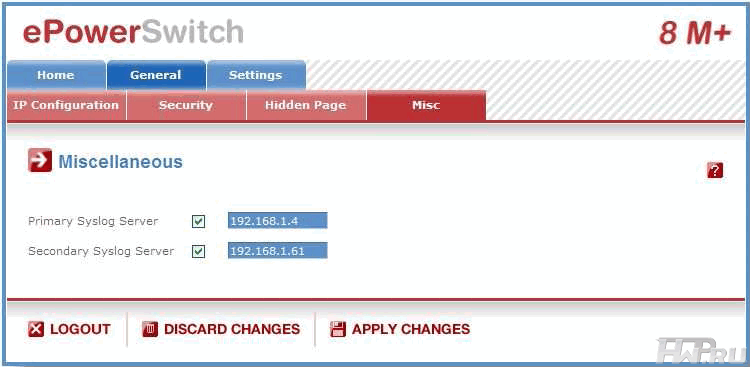
As befits any serious system, ePowerSwitch can log, the interface allows you to set server addresses for this purpose.
In the Settings section there is a subsection for managing accounts, which is also a very handy thing.
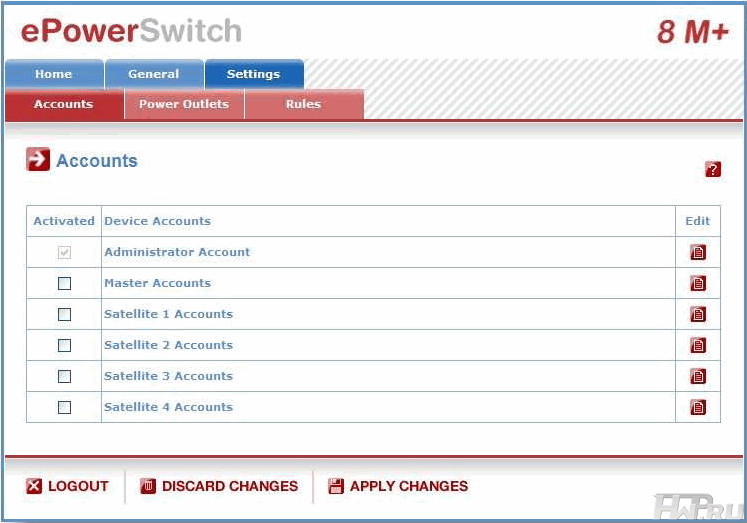
You can create and edit your list of accounts for each ePowerSwitch 8M + (Master) or ePowerSwitch 8XS (Satellite).
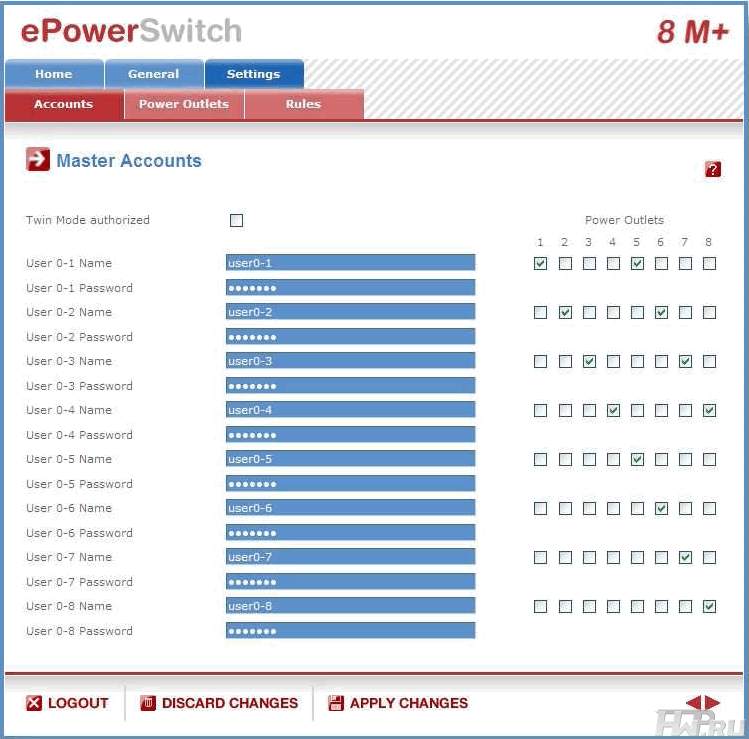
It's easy to understand why this is needed, let's say you have 8 clients, each of them has a server installed on your site, and each of them would like to control the power supply of its server. At the same time, even if they are reliable people, giving them access to power management of other people's servers is extremely risky, not by malice, they will be turned off by mistake. Therefore, up to 8 accounts are created for one 8-channel module, and access to the sockets is clearly and clearly delineated.
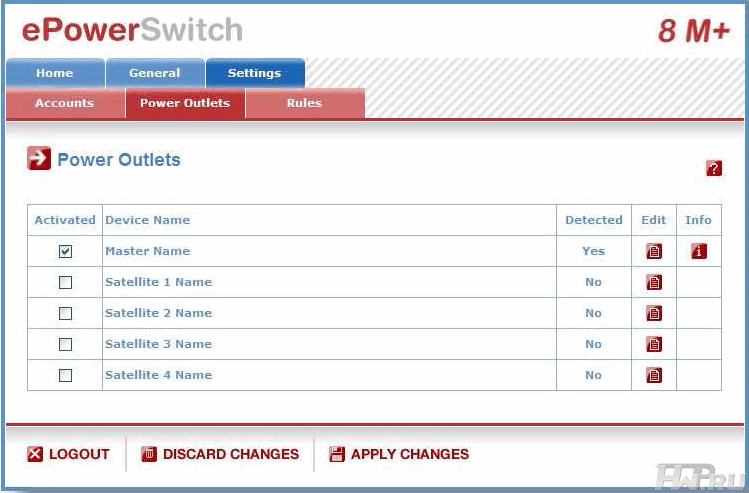
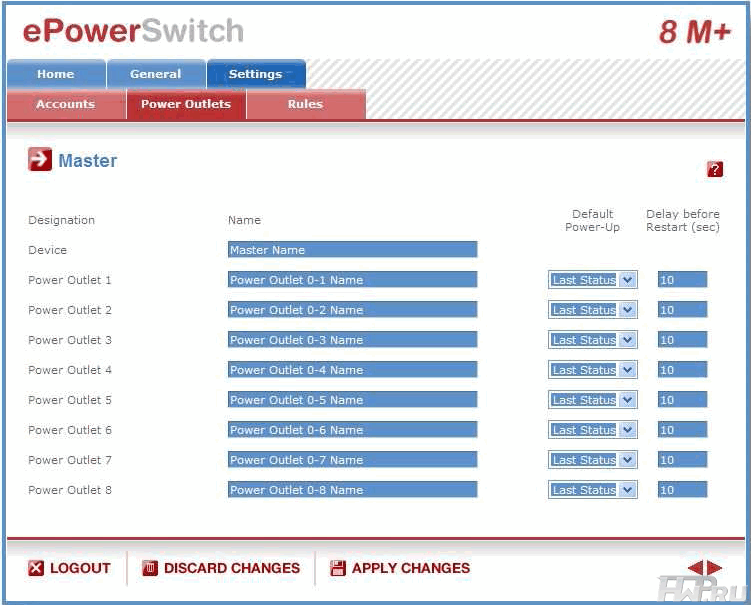
The tab dedicated to sockets settings allows you to set for each of them the state in which the outlet should be by default when the device is turned on, as well as the delay, in seconds, when performing a reboot.
Another very administrator-friendly tool is rules. You can create 8 rules and apply them all at the same time.
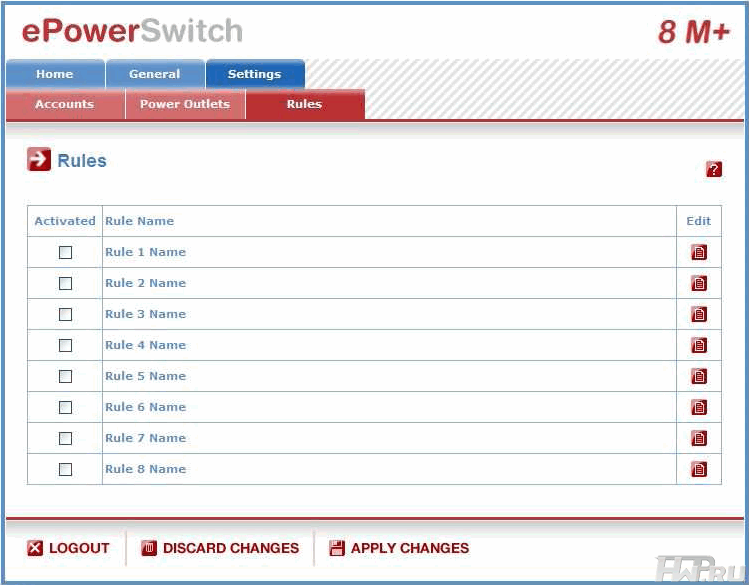
What is the essence of the rules (not the most obvious function for a power management device), and why are they so good? And the fact is that it is they who allow you to automatically restart the server if it freezes. Of course, not instantly, but within a minute after freezing - for sure.
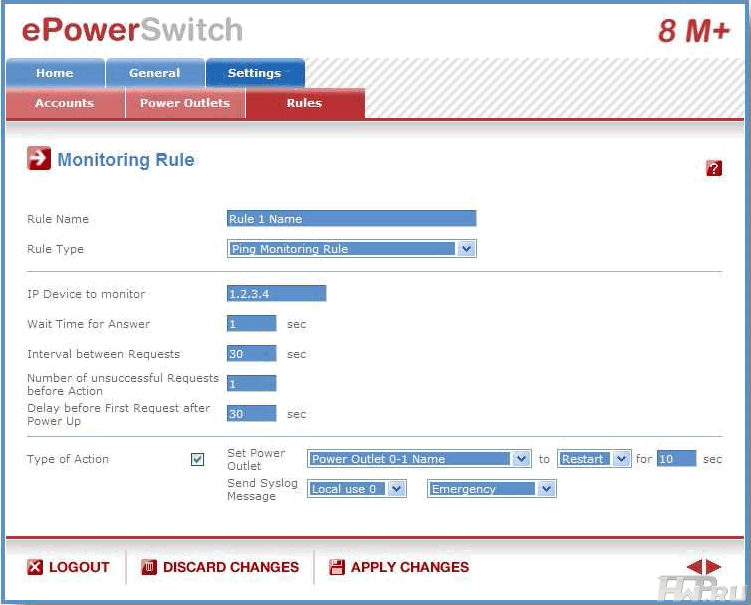
Set the address to be pinged periodically, the interval to wait and the number of unsuccessful attempts before doing anything. If the specified address does not respond, for example, a reboot is carried out for the selected socket. It is possible, in principle, with the help of such a rule to turn off the failed server and turn on the spare. By the way, about fault-tolerant solutions. The ePowerSwitch system, in particular, ePowerSwitch 8M + and ePowerSwitch 8XS, allows you to conveniently work with servers that have two power supplies, i.e. with redundant power supply. By checking the Twin mode checkbox, we get not 8, but 4 channels per ePowerSwitch 8M + device, but each of the channels is 2 sockets controlled synchronously.
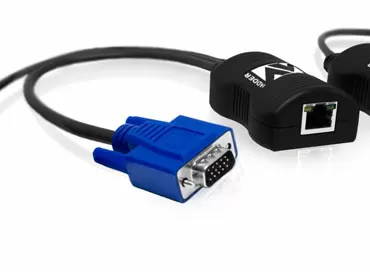
The "high reliability" declared by the manufacturer was confirmed, and no problems arose during the week of testing. Trying to use all sorts of configurations for turning on, turning off and rebooting connected devices, we never encountered any problems in operation. During testing, rack-mounted servers of various configurations were connected to the power management device, as well as a KVM over IP switch from Adder AVX4024IP, which we will talk about next time.
Conclusions
In this case, the conclusion is quite obvious - the power management system is an excellent addition to the classic KVM. Moreover, in very many situations, such a solution based on ePowerSwitch 8M + and ePowerSwitch 8XS or the like, turns out to be more convenient, cheaper and easier than KVM. After all, a failed server still usually starts working normally after a reboot, and a frozen computer cannot be rebooted from the keyboard and mouse. Classic KVM solutions are convenient and acceptable when, in case of urgent need, you can relatively quickly reach the server room and reboot a machine on strike. If you are often very far away, and physically getting to the server is not easy, then a KVM system, supplemented by a power management system, would be ideal. If you put both systems at a cost, perhaps it is worth stopping at a system that can send the server to reboot from any state. Let the tool be radical, but for all occasions, but you can establish access to a normally working server entirely by software.
Evgeny Volnov
07/28/2009