An in-depth review of TP-Link Omada SDN: setting up VPN, manage VLANs
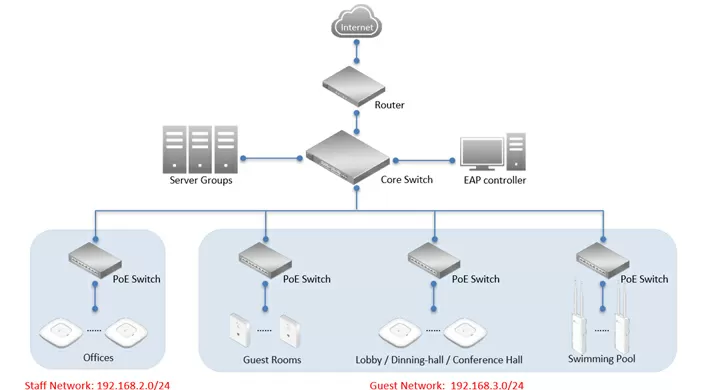
Today, network management systems can greatly facilitate the management of IT infrastructure, even at small facilities, not to mention large distributed installations with branches in different parts of the world. Agree: the sysadmin will sell his soul for the ability to configure a VPN tunnel between two offices at the touch of a button, and this is just a drop in the ocean-one of those moments that simplify, reduce the cost and make your network more flexible. The diagram below shows the usual scenario of network deployment in a hotel complex: here authentication is used through a portal for an internal wireless network plus a guest network distributed in several rooms, or even buildings.Without the use of a common controller, it would be impossible to arrange work in a guest network with support for 802.11 k/r.
Today, using the example of TP-Link equipment, we will consider the process of configuring Internet access, VPN tunnel and Wi-Fi through the Omada management system. I must say right away that the choice of any SDN orchestration system means the evolution of the infrastructure to monobrandedness: all network devices, starting from switches and access points and ending with gateways, should not just have one brand, but be compatible with the SDN controller. This has both its advantages (easier management, usually better stability, a single window of the warranty service center), and disadvantages - for example, your supplier may simply not produce devices with the specification you need. TP-Link company today has in its arsenal the entire nomenclature for building Wi-Fi 6 networks, starting from gateways and ending with access points.
Test Bench
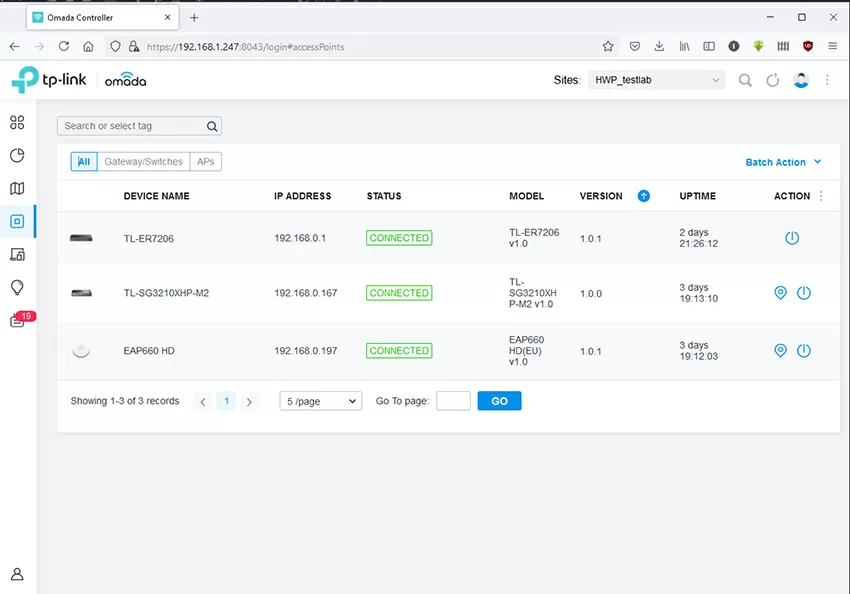
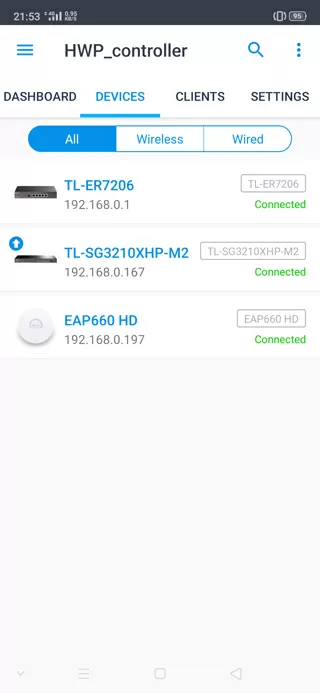
Of course, modern orchestration systems do not always allow you to configure advanced parameters, and specifically TP-Link Omada focuses on simplicity and visual perception, but really - in my practice, the deployment of a Wi-Fi network with a fault-tolerant Internet has never been so simple. Let's take a typical fleet of devices: a gateway, a switch, and an access point and install it.

- Gateway: TL-ER7208
- Switch TL-SG3210XHP-M2
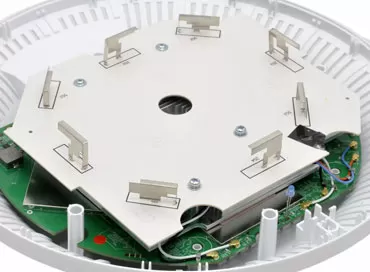
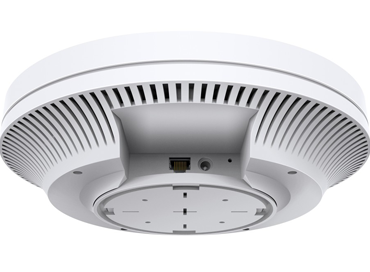
- Access point: EAP660HD
- AMD EPYC 7531p based server
We will start building a network with the segmentation of the local network, but first a few words about the software control controller.
STEP ONE! We install TP-Link Omada-a software controller in the local network
The first generation of SDN systems was a physical device that was mounted in a rack. Then software management tools began to appear, installed in a virtual machine on a local network (this is what Ubiquiti did), later a cloud solution (Zyxel Nebula) appeared, working via the Internet, and the youngest product in this class, Omada from TP-Link, combines all the above-mentioned types of use: the company also has hardware controllers (OC200 and OC300), there is software for Windows and Linux, and a cloud one is about to appear. In addition to the OC200 and OC300 hardware models, everything else is free, which is very important in terms of budget savings.
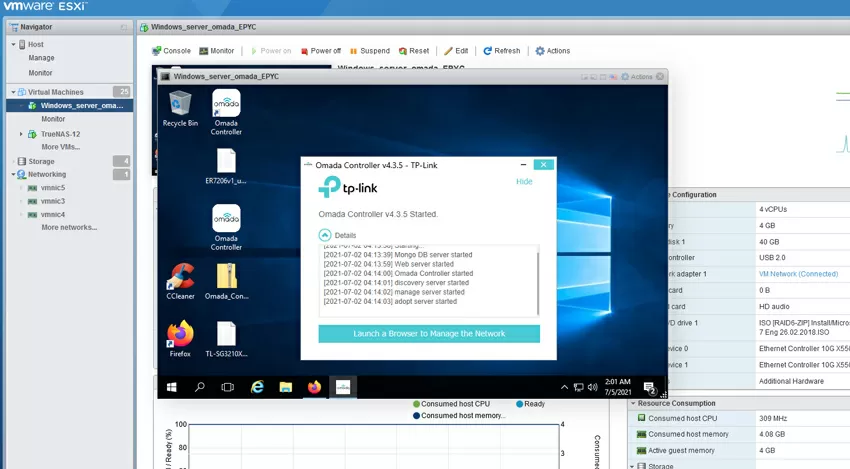
With the exception of the cloud solution, the Omada controller is located in your LAN network, and the easiest way to install it is to put it somewhere in the Windows Server virtual machine and install the distribution kit from the TP - Link website, you will also need to install the latest version of Java.
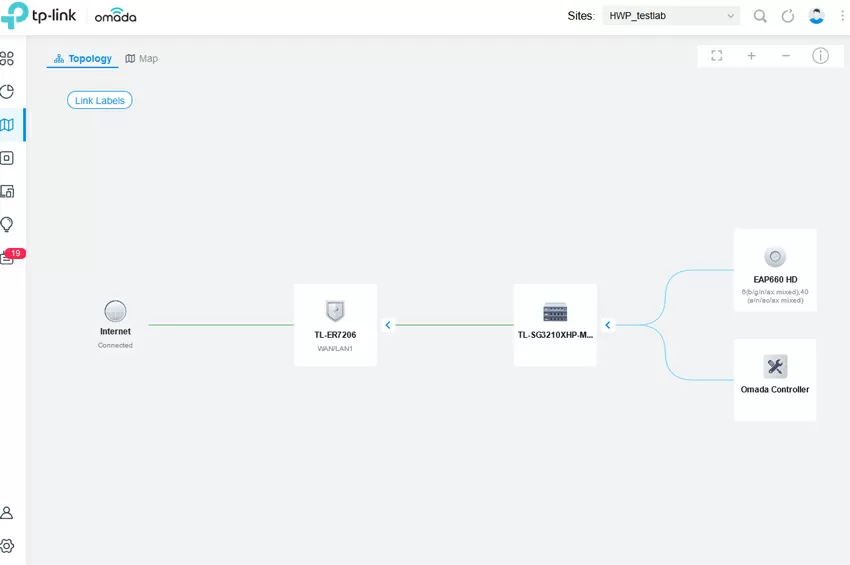
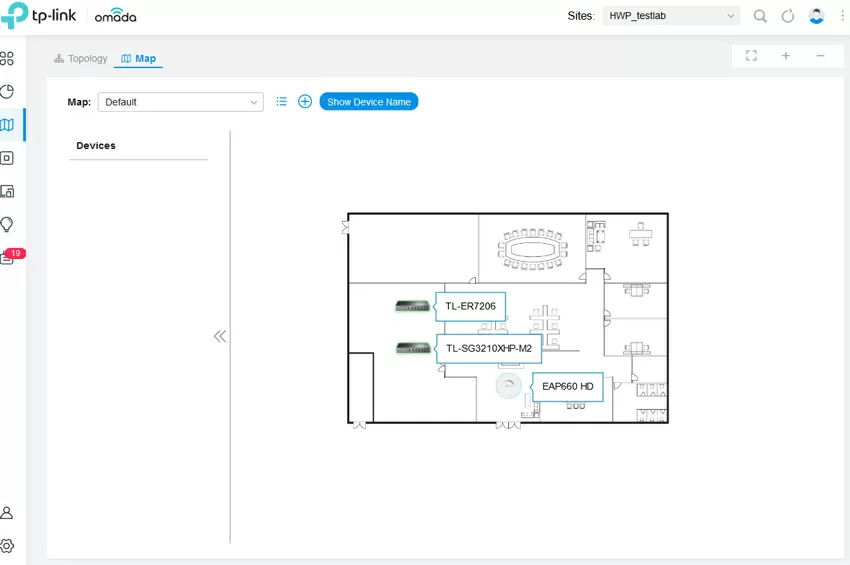
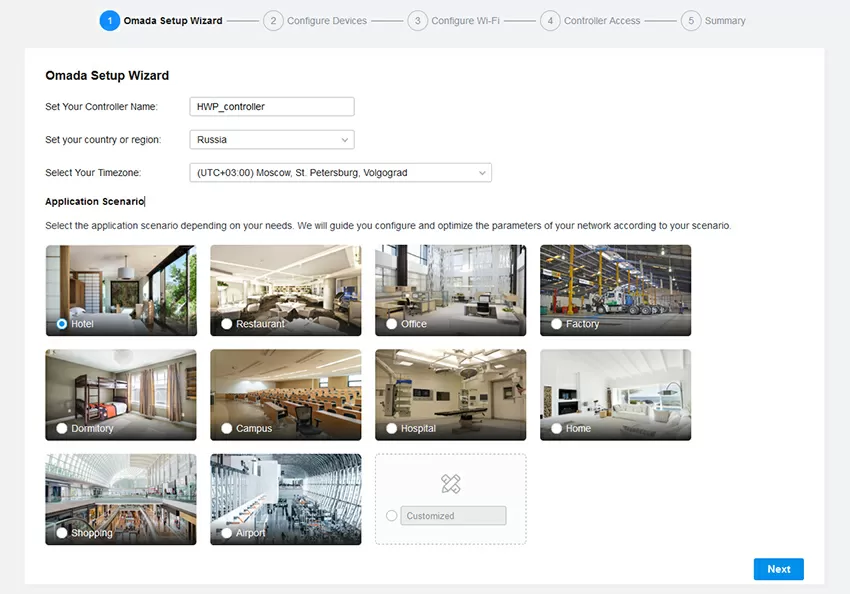
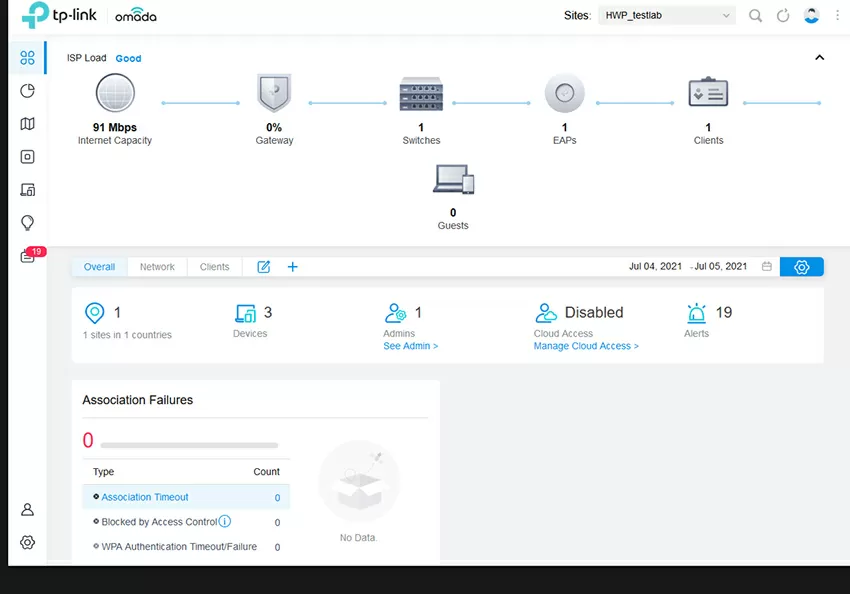
Actually, after installation, you will find a simple setup with presets for different system deployment scenarios: hotels, offices, cafes, etc.For ease of administration, the network topological scheme will be automatically rebuilt, which you can transfer to the plan scheme.
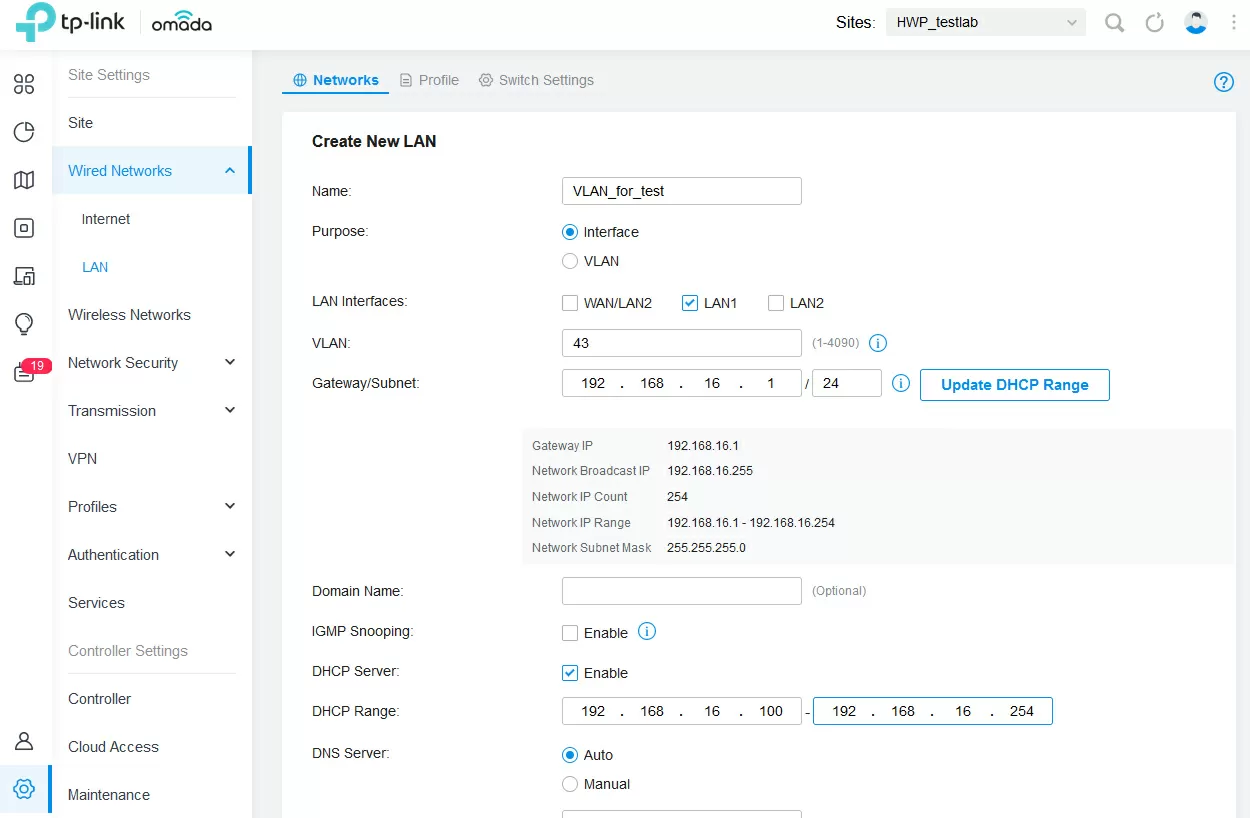
STEP TWO! Configuring VLANs and subnets
In our case, let's start with the arrangement of virtual networks, VLANs in the object editing menu (site) in the Wired Networks section. TP-Link Omada allows you to configure the VLAN in two ways: the first is just a virtual network by itself, this division will be used on switches. The second is the configuration of subnet segments on the access gateway with its own IP address ranges and DHCP servers, which makes it possible to immediately identify the client to the desired virtual network and write to the specified IP range.
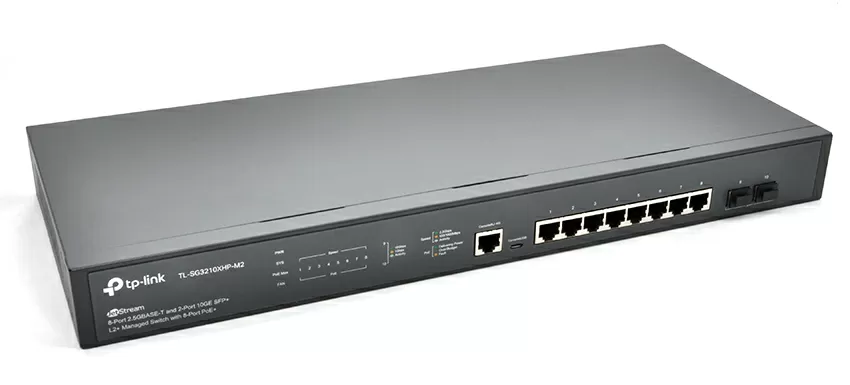
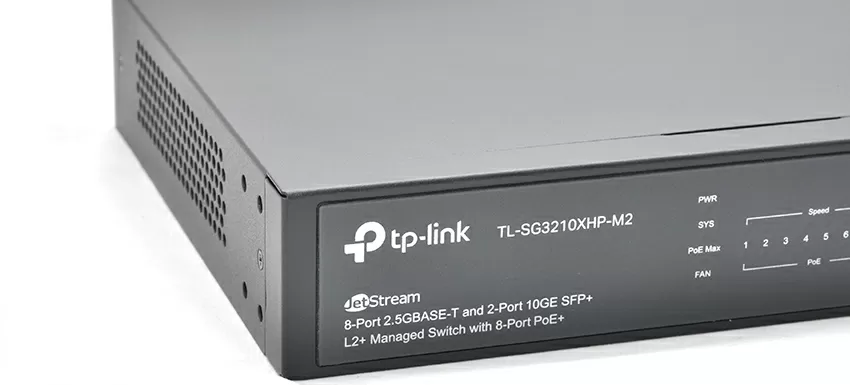
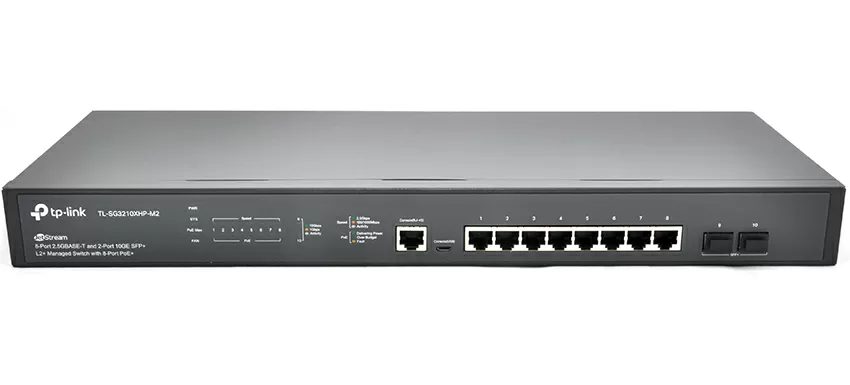
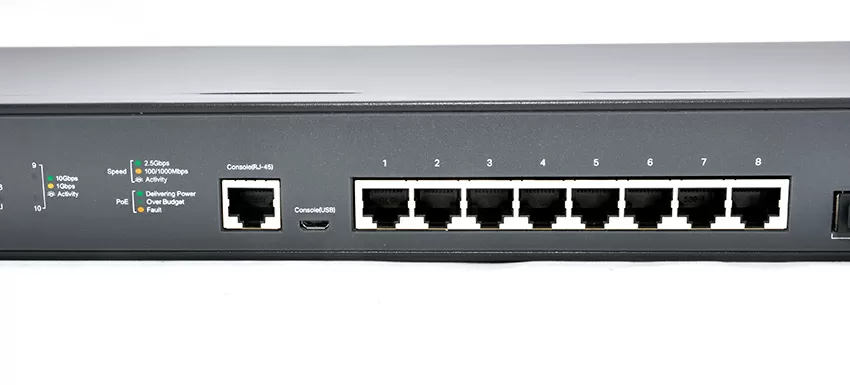

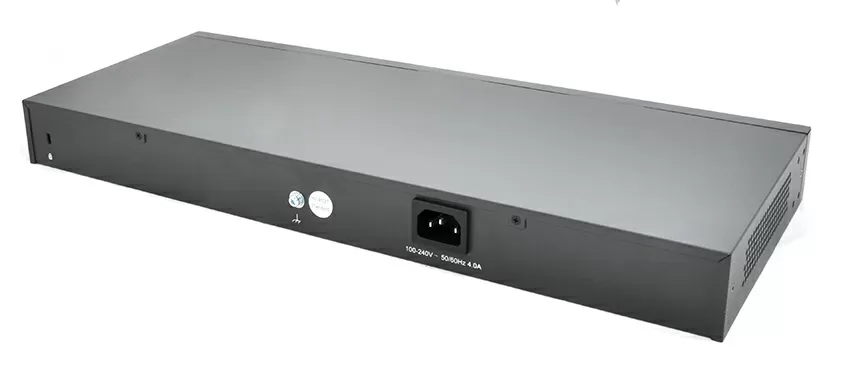

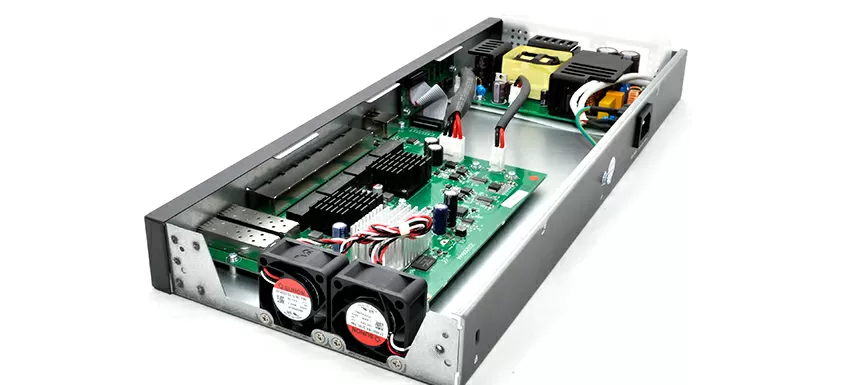
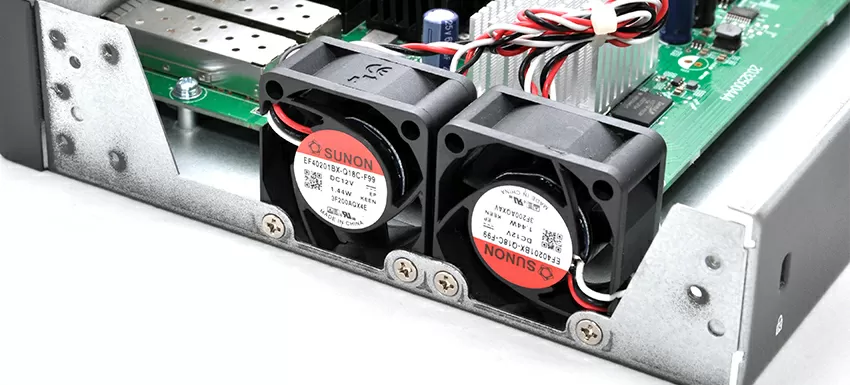
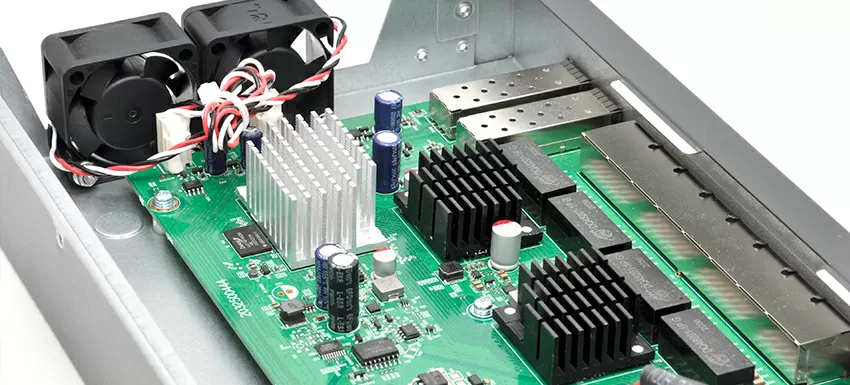
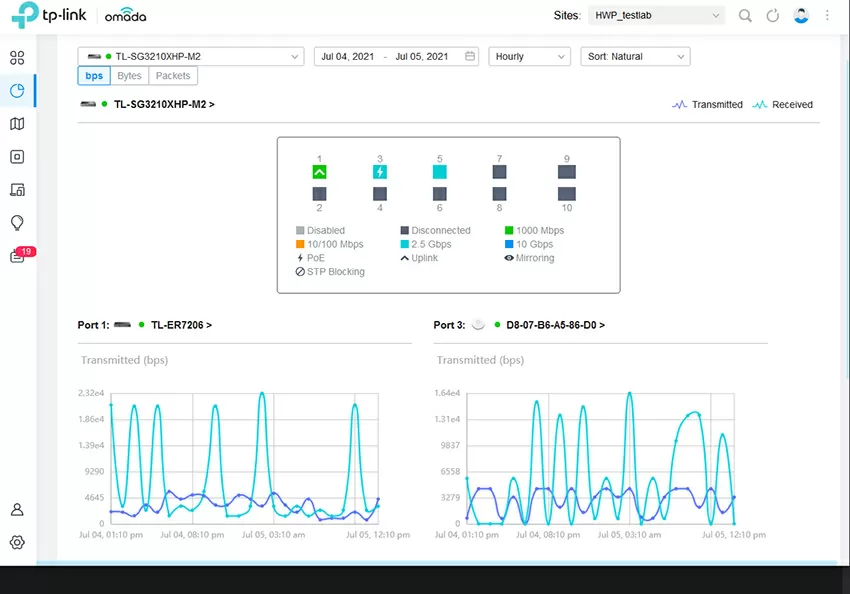
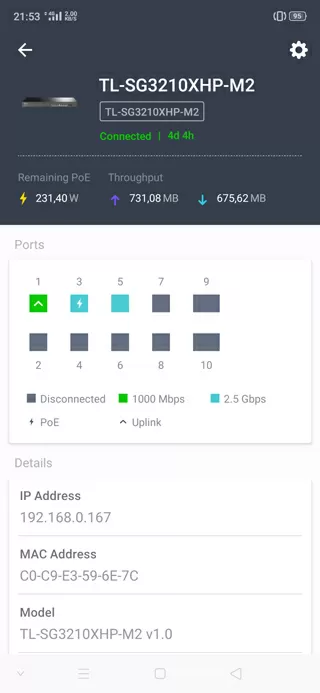
We used the TL-SG3210XHP-M2 PoE switch, which is specifically designed for deployment in Wi-Fi 6 environments. It has two 10-Gigabit SFP as an uplink, and the distribution part is 8 PoE+ RJ45 ports with a speed of 2.5 Gbit/s. The total PoE budget is estimated at 240 watts, the switch itself consumes 17 watts. The device is cooled by two fans, which is why it works quite loudly even without a connected PoE load, so you need to mount the TL-SG3210XHP-M2 in a separate room or a soundproof cabinet. The switching matrix is equal to 80 Gbit / s, which is equal to the sum of the speeds of all ports in duplex mode.

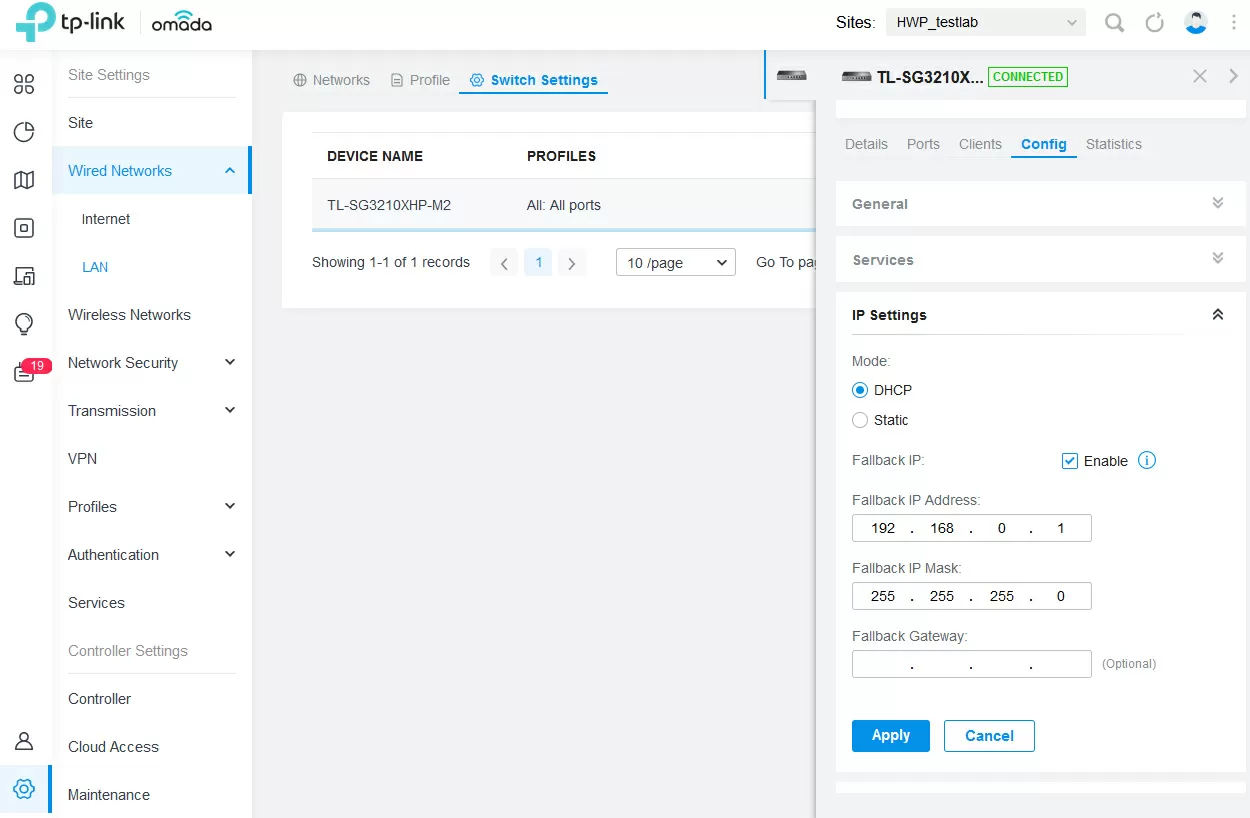
Interestingly, the switch belongs to devices of the L2+ class, and can bind an IP address to a port, but not all L3 functions are currently configured through the controller: for example, static routing through the controller is available, and the VPN VLAN and IP-MAC-Port binding are configured already in Standalone mode.
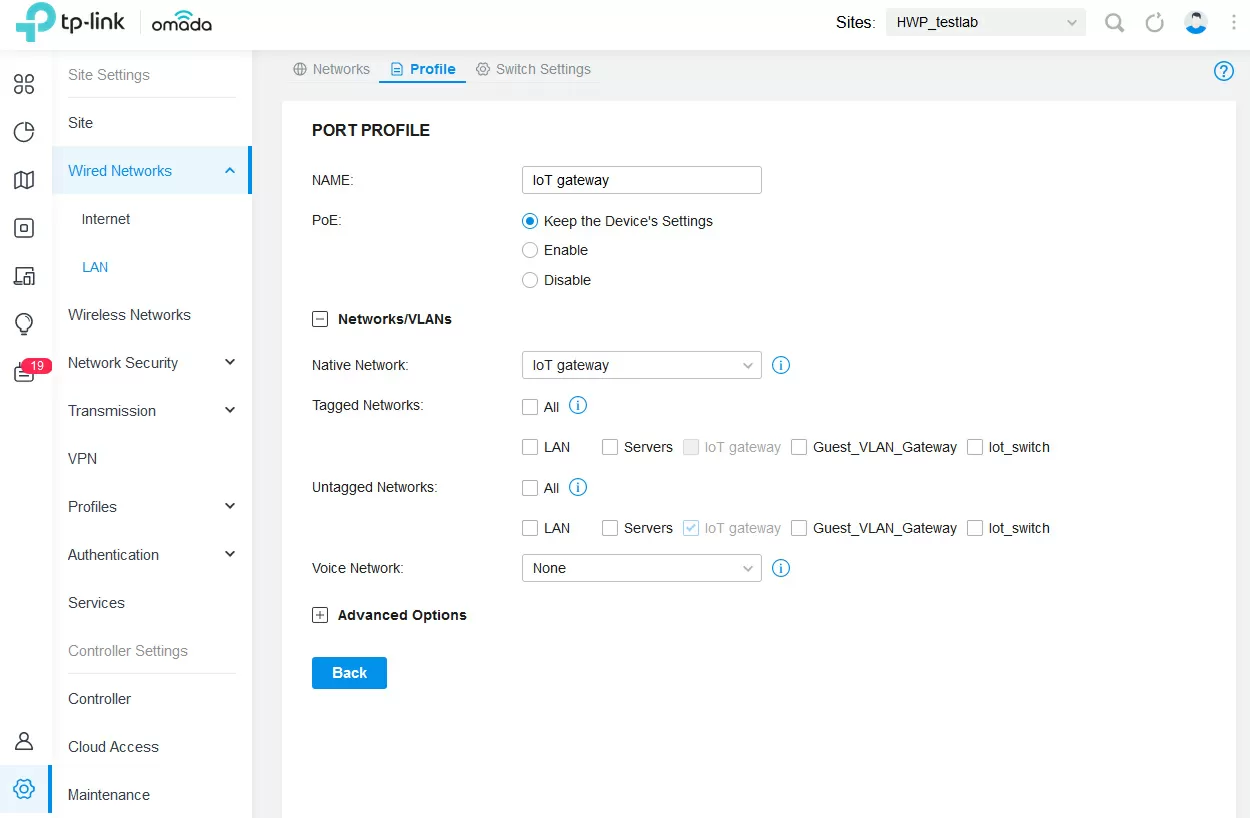
But the arsenal of what we have now is sufficient: there can be up to 4096 virtual networks, and by setting each VLAN together with a description, we can further operate with their names, so that it is easier to navigate in profiles, subnets and VLAN tags When it comes to access, each port can be assigned a separate profile, in which you can specify which tagged and untagged traffic from which VLANs will be served by this particular port. For high-priority voice traffic, you can use a separate VLAN and enable LLP-MED, then the switch will automatically increase the priority over 802.11 p of all traffic in this virtual network, saving you from configuring QoS. Ports can be isolated or disabled, and bandwidth can be limited for both all and specific MAC addresses. There is also support for channel aggregation. In reality, the switch is powerful, and setting up here is easier than anywhere else.
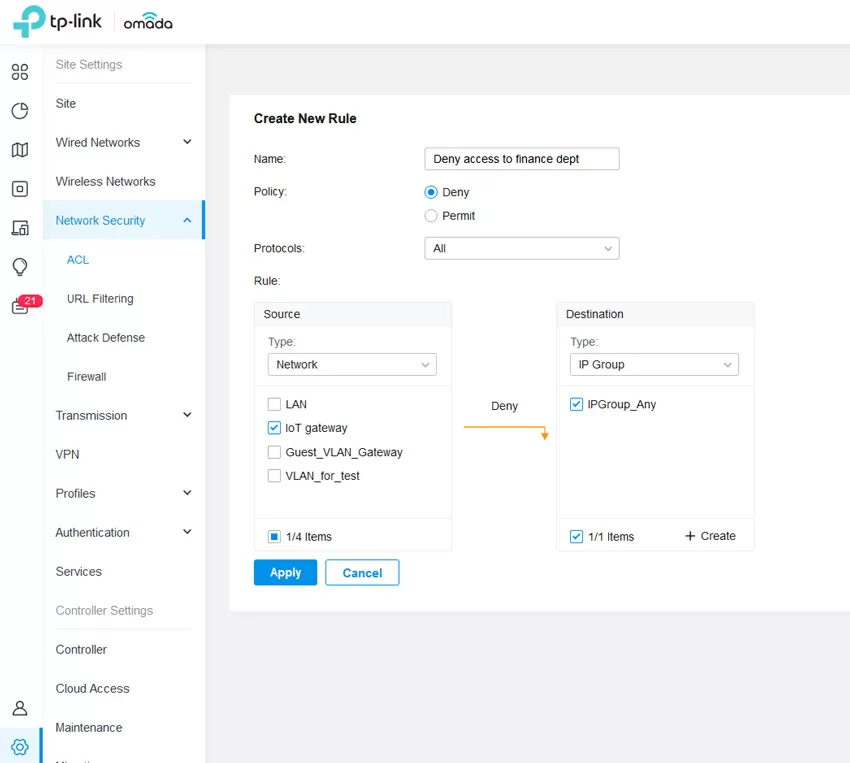
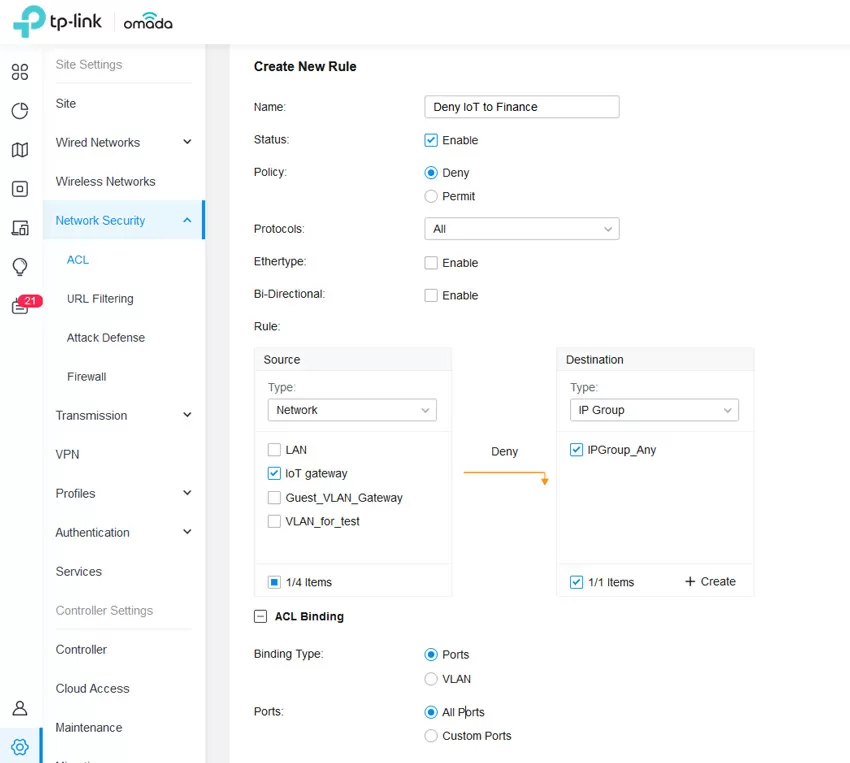
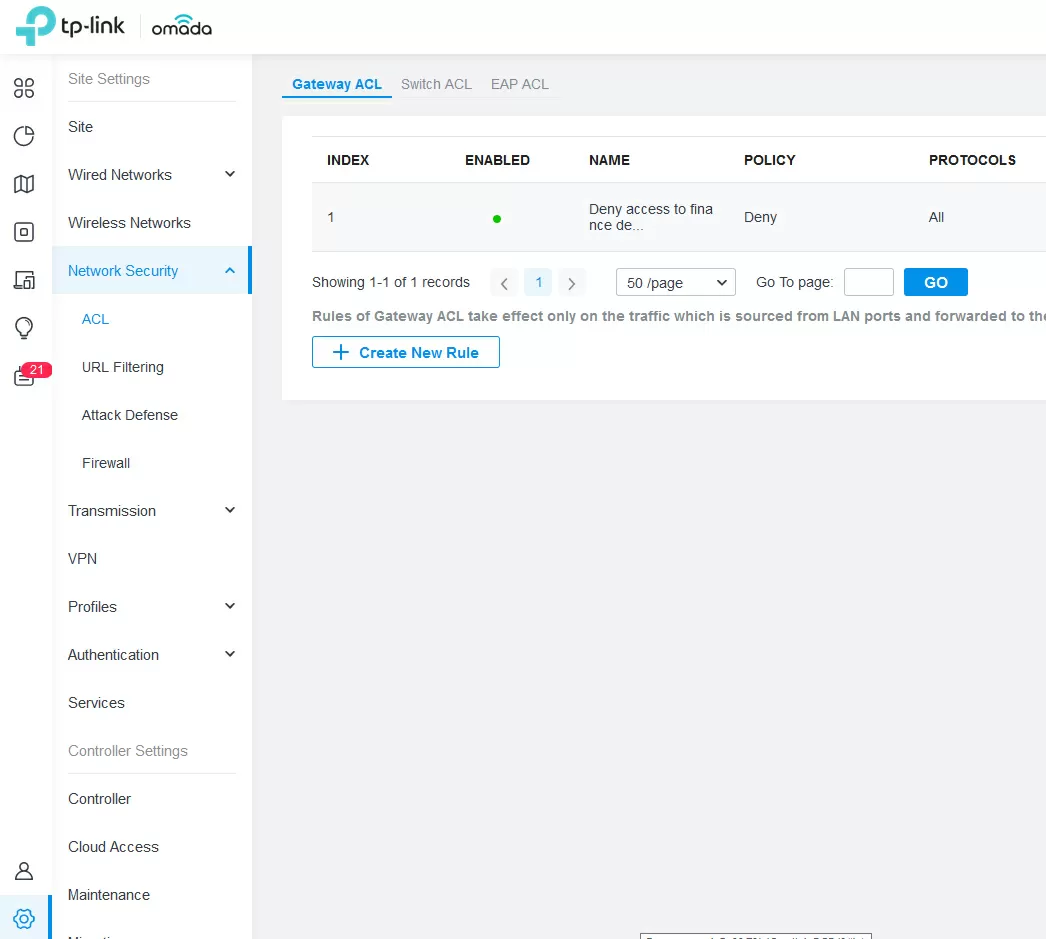
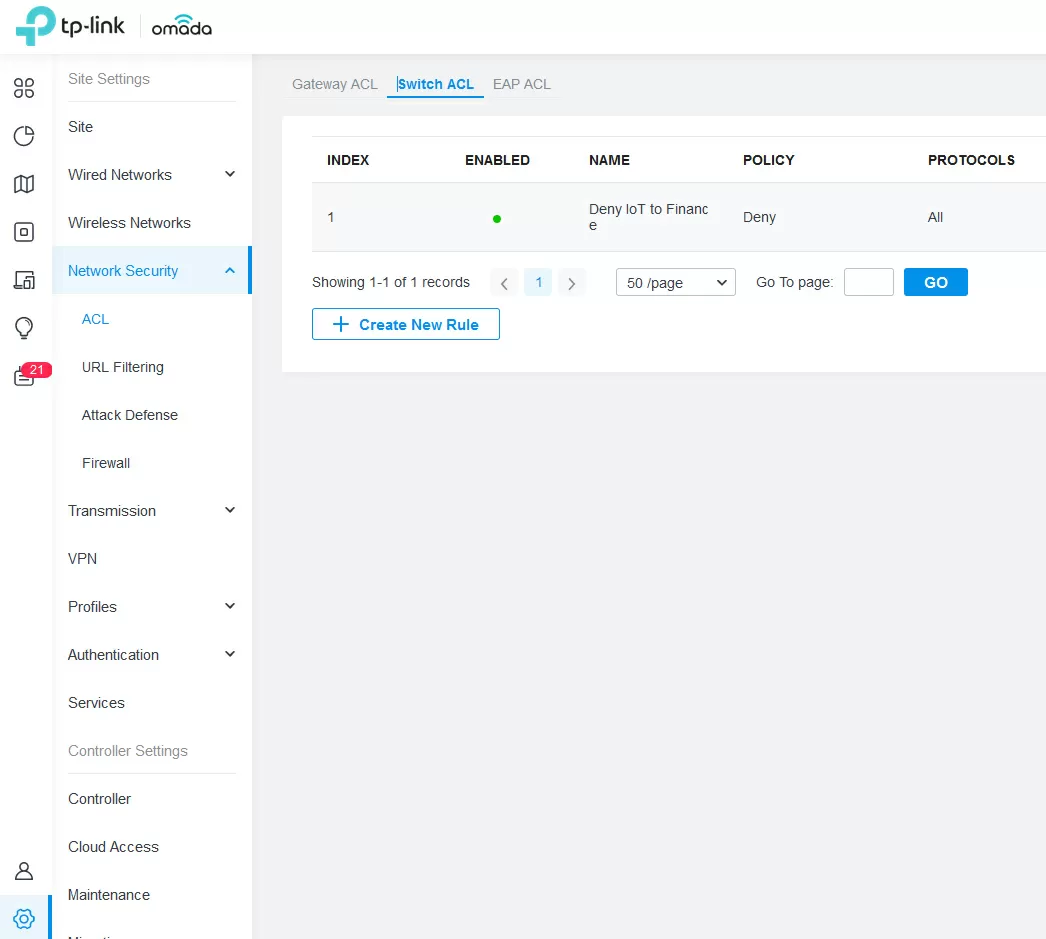
STEP THREE! We set the basic network protection
Security settings are represented by rules for ACLs of lists implemented on an access gateway, switch, or access point. If you want to block devices from accessing the specified subnets, leaving only access to the Internet, then you are here. Interestingly, the ACL is configured separately for access points, switches and gateways, but the principle is the same everywhere: you specify which subnet to prohibit or allow access to which IP range, well, plus on the switch this binding can be done to VLANs or ports.
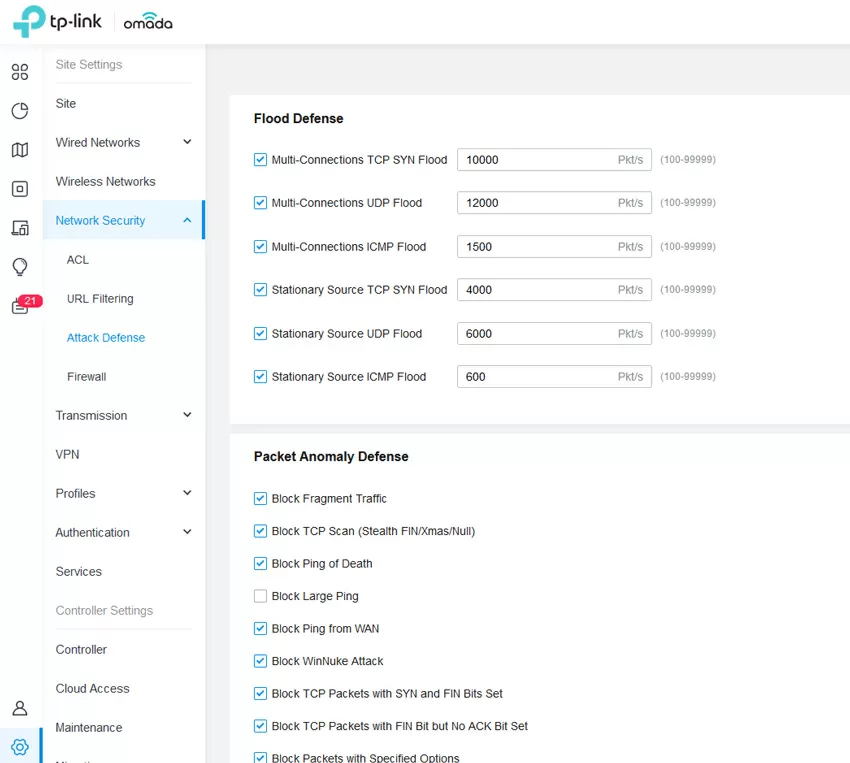
To protect against DDoS attacks using the buffer overflow method, there is an anti-flood for TCP, UDP and ICMP.
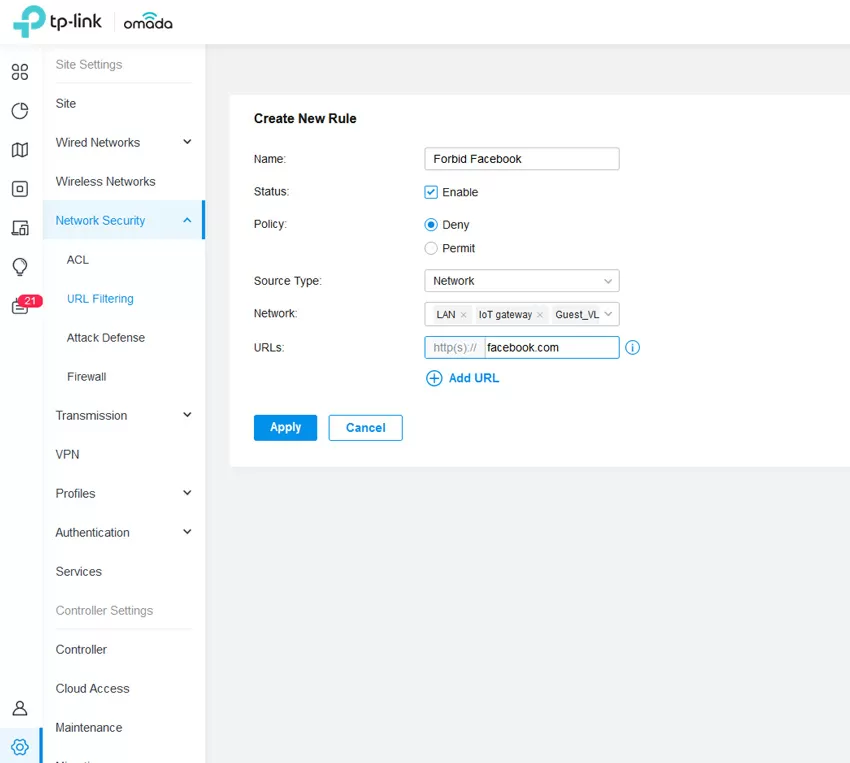
But the restriction of access to Internet sites is done purely for show, since you will have to enter each such URL manually. I think that hardly anyone will use this function.
STEP FOUR! We configure SD-WAN, fault-tolerant and balanced Internet
Today, no sane network company bypasses the SD-WAN technology, and on the pages of our resource you will find many publications on the topic of software-defined Internet access. The simplest implementation of SD-WAN is to provide fault tolerance together with balancing the channel load by traffic.
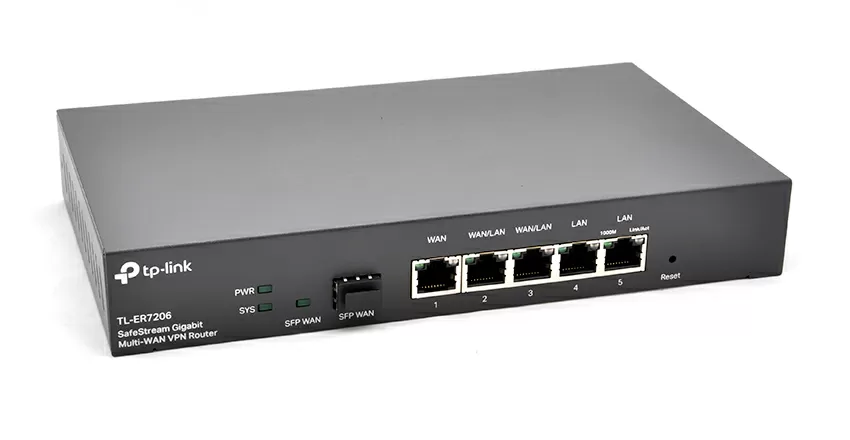
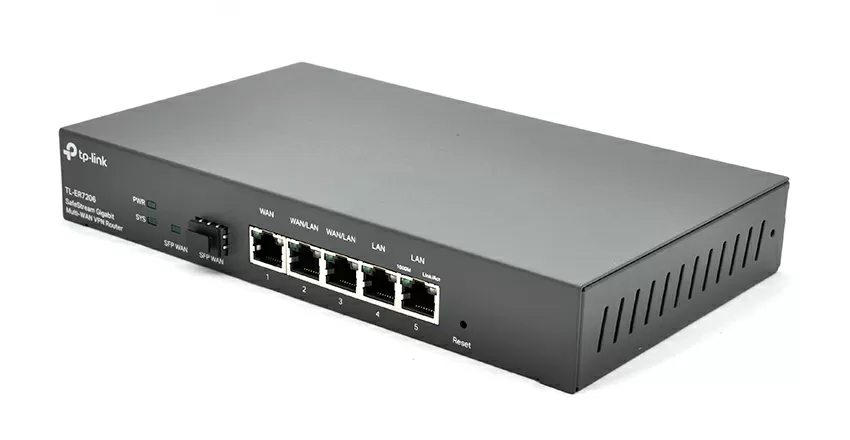

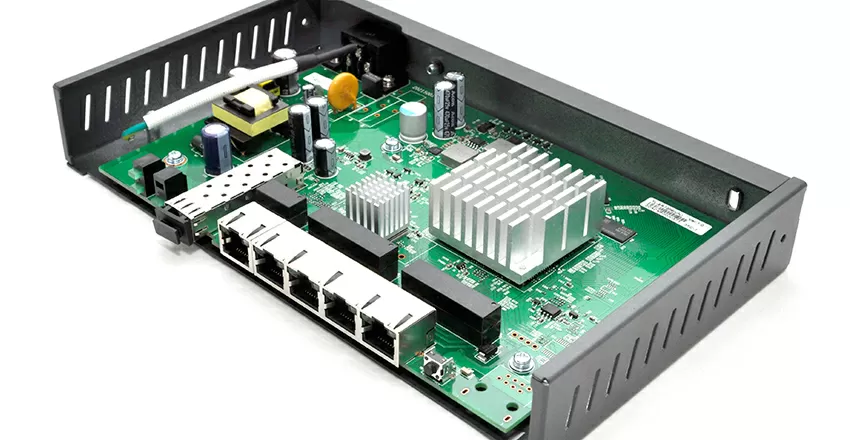
Our test gateway TP-Link TL-ER7206 has as many as 4 WAN ports: dedicated SFP and RJ45 and combined WAN/LAN RJ45. All ports are Gigabit, with the possibility of replacing the MAC address. When load balancing, you can set your own weight for each of the ports, giving priority to the fastest one.
In order for applications and services using multiple connections to remain operational when two Internet channels are working simultaneously, the Omada controller prescribes routing so that traffic from the same subnet IP addresses from the same ports goes through the same WAN channel.
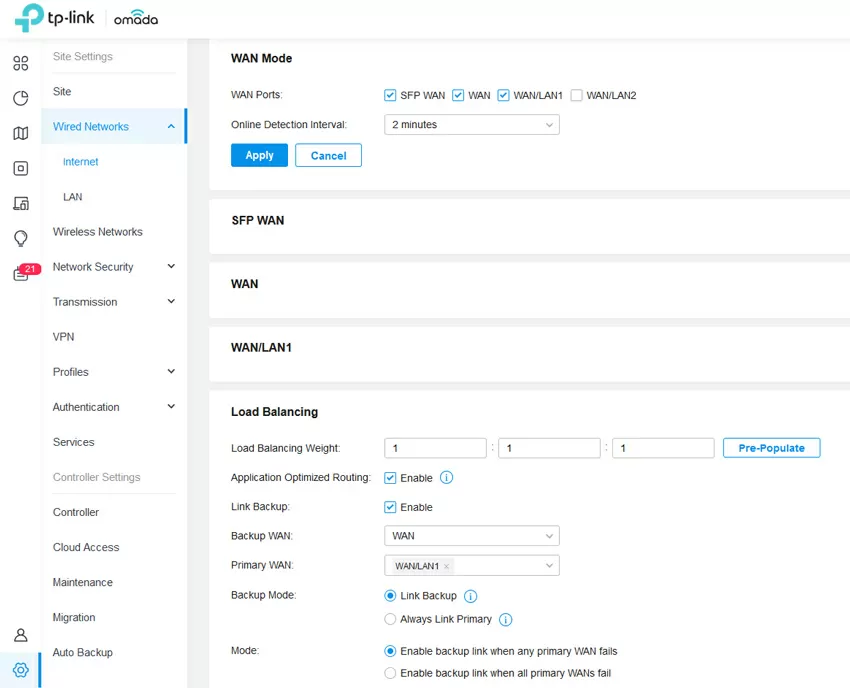
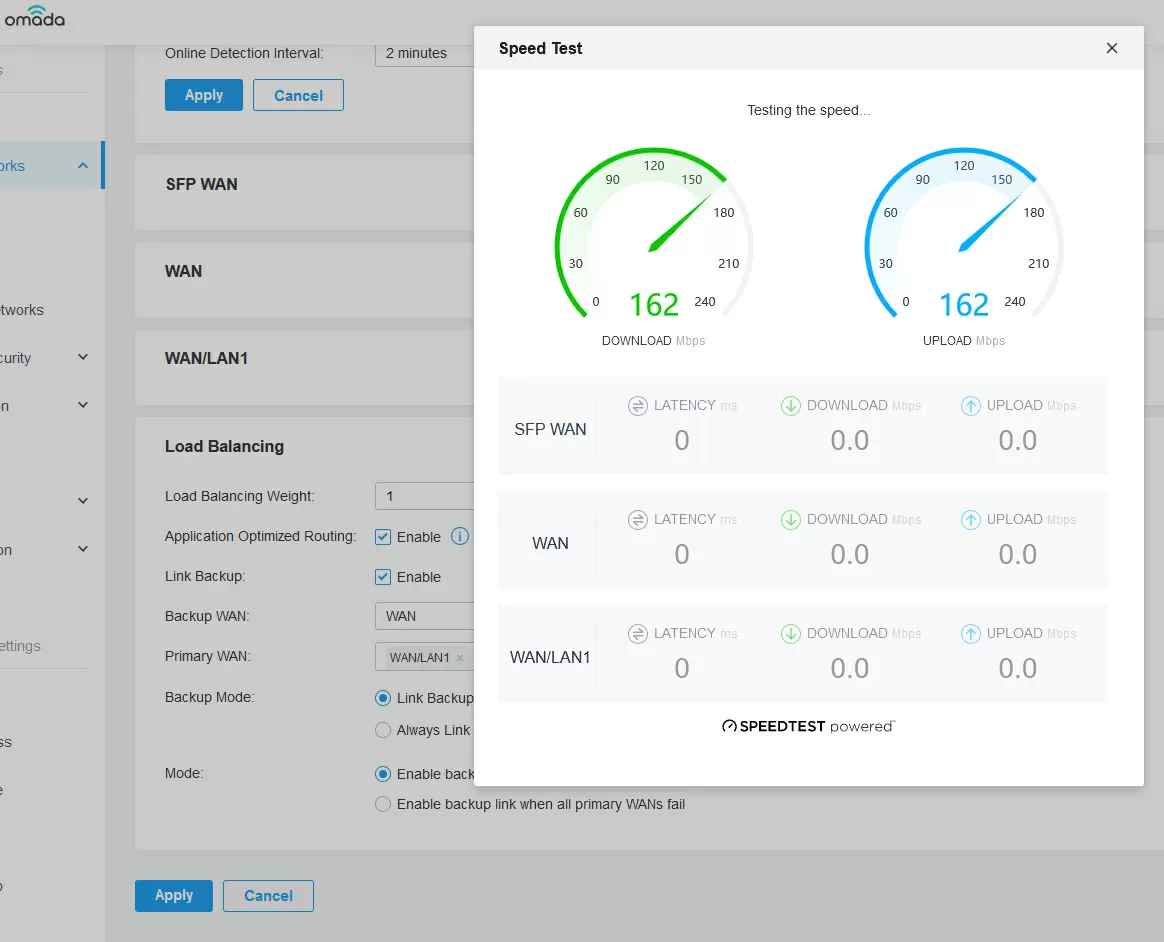
However, you can simply use two Internet channels in the "active/standby" mode with switching and subsequent return in case of a breakdown.
Periodically, the gateway tests the Internet speed by downloading from the site Speedtest.net so if your company uses several communication channels, you can configure the gateway to always choose the fastest, least loaded one.
STEP FIVE! Configuring the WLAN and IoT
The next step is to set up a wireless network on the EAP660HD access point. We will create two networks: one is shared, with an open SSID in the 2.5 and 5 GHz bands. Since our access point supports Wi-Fi 6 (and not just supports it, but has 8 spatial streams and a 2.5-Gigabit connection), for security, we will already enable the WPA3 standard, leaving compatibility with WPA2. I want to note that such parameters as Band Steering, roaming or MESH support are generally set in the site settings and act globally on the entire wireless space.
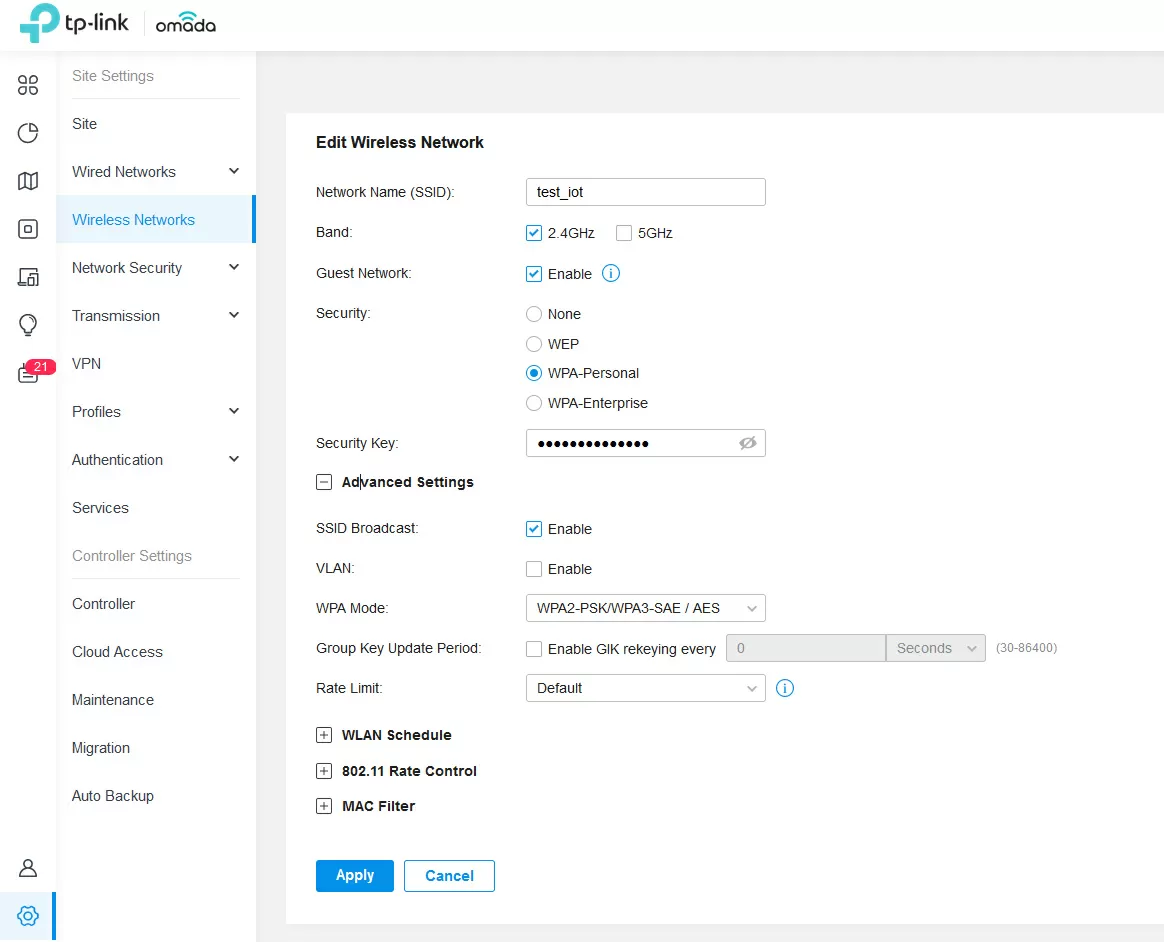
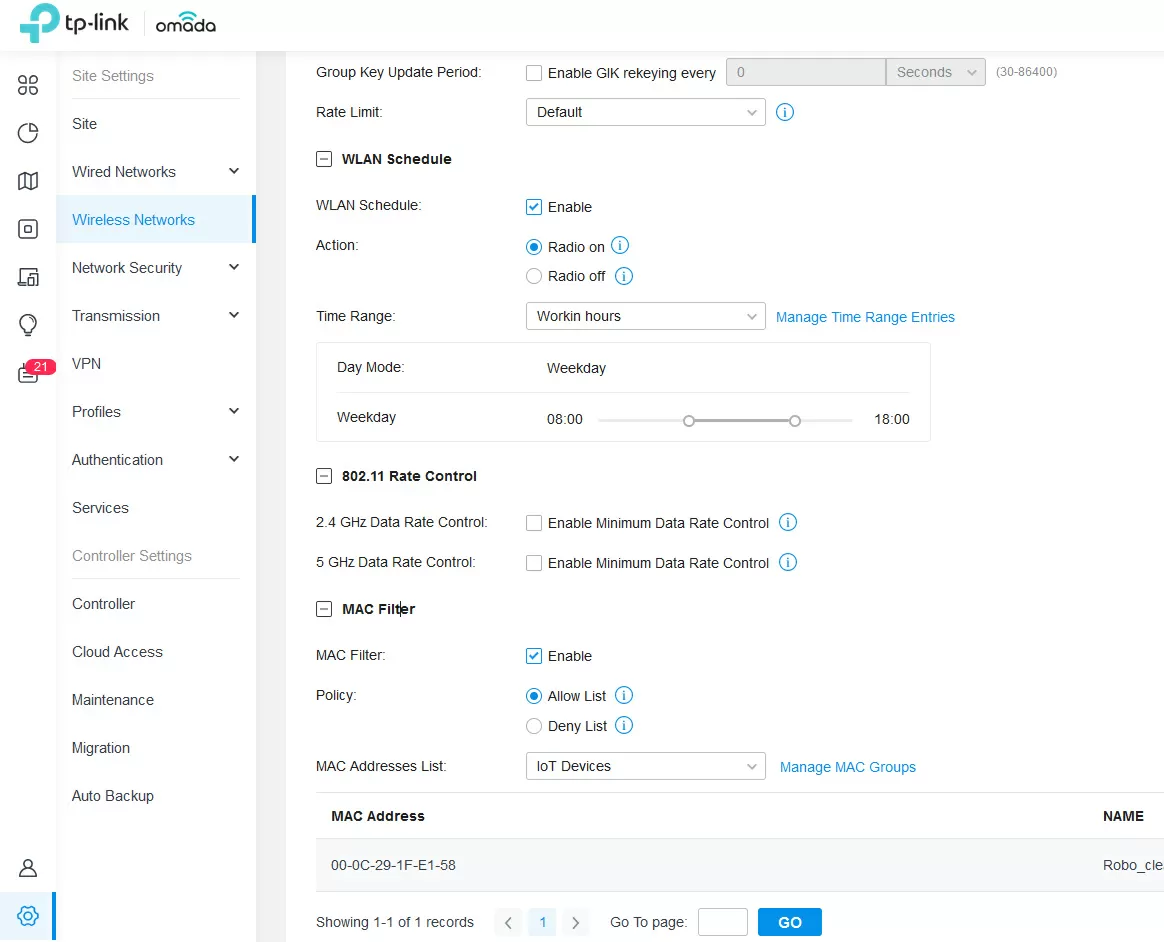

We will create the second network only in the 2.4 GHz band, and it will be intended for wireless IoT devices. By enabling the "Guest Network" parameter in the SSID settings, we will prohibit access of all devices connected to this network to private IP ranges such as 10.10.10.x, 192.168.x.x, etc., while maintaining Internet access. This is the easiest way to securely connect IoT devices: on the one hand, all these Chinese light bulbs, printers, weather stations remain operational through their cloud services, and on the other hand, even if they are hacked or initially contain exploits, your local network is protected as reliably as using WLAN or isolation at the L2 level.
Of course, you can create a separate VLAN for IoT devices by analogy and block access to the local network at the switch level, but this is already excessive protection.
STEP SIX! Setting up a VPN
If you have several objects in your arsenal with TP-Link equipment installed, and all of them are listed in Omada Cloud, then to raise a VPN tunnel between them, it is enough to select the desired object in the list and click one button. Well, since everything is somewhat more complicated in the real world, you can configure the VPN manually by installing the gateway both by the client and the server. L2TP, PPTP, IPsec and OpenVPN are supported here, which allows you to raise a tunnel on any port and through UDP and TCP transport.
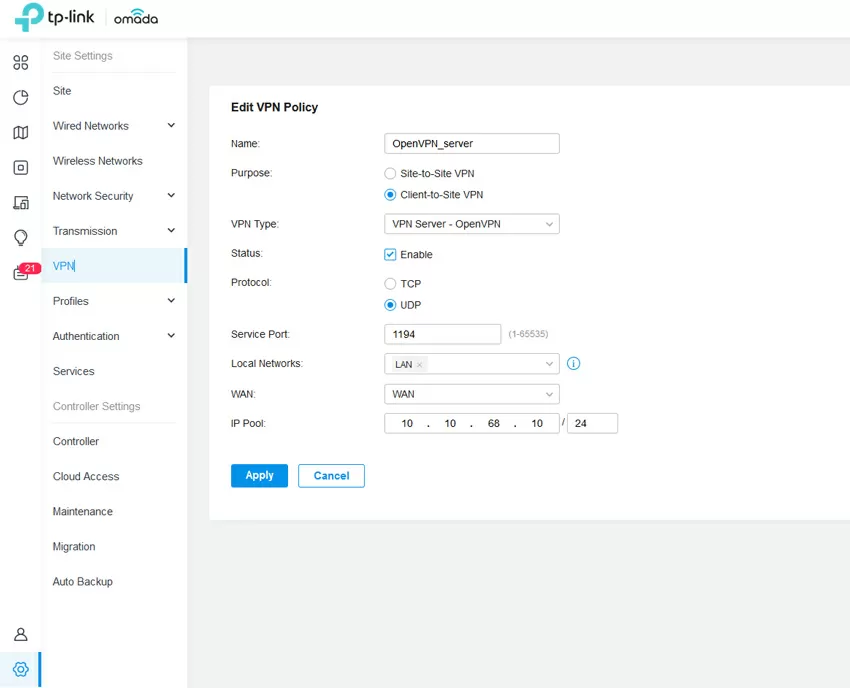
Keep in mind that the VPN is always tightly bound to the WAN interface, and all the magic of SD-WAN does not apply in this case. So if you have several communication channels, configure a tunnel for each of them.
STEP SEVEN! The final touch
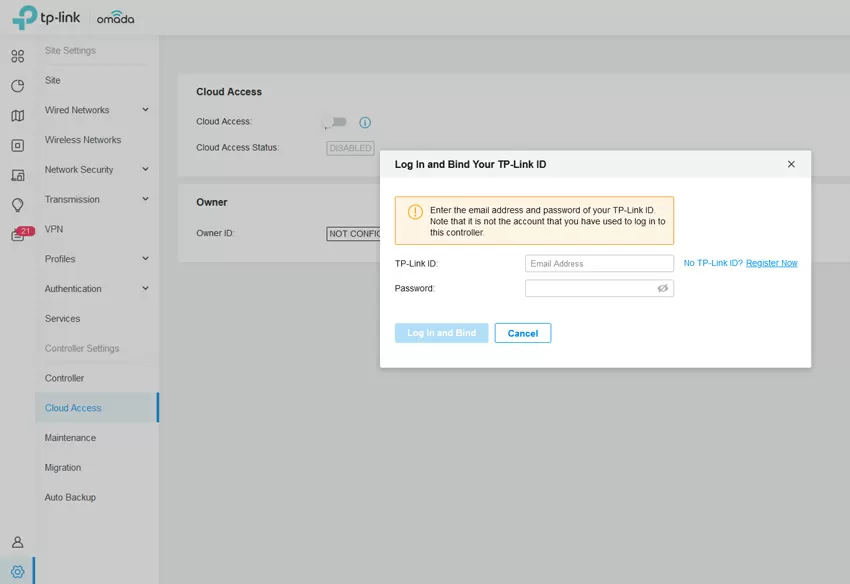
Of course, we will leave a lot of small but useful settings behind the scenes (such as NAT, enabling PoE on a schedule, allocating vouchers for Wi-Fi...), because we cannot reveal the full functionality of Omada at one time. But what you definitely need to remember to do is connect cloud access via the Internet so that you can manage our network even if it is deep behind NAT or has a private IP address. Now, to provide such access, a "light" cloud is usually used on the vendor's side, and it is important to understand that even though you will have to register on the TP-Link website, in this case it will simply work as an administrator's access gateway to the control panel. No personal data of users or settings are stored on TP-Link servers - only password hashes, but... this is what I was told, but it is not mentioned anywhere in the documentation or on the site, although such things should be written in the header of the site in the 36th font, you can even replace the logo.
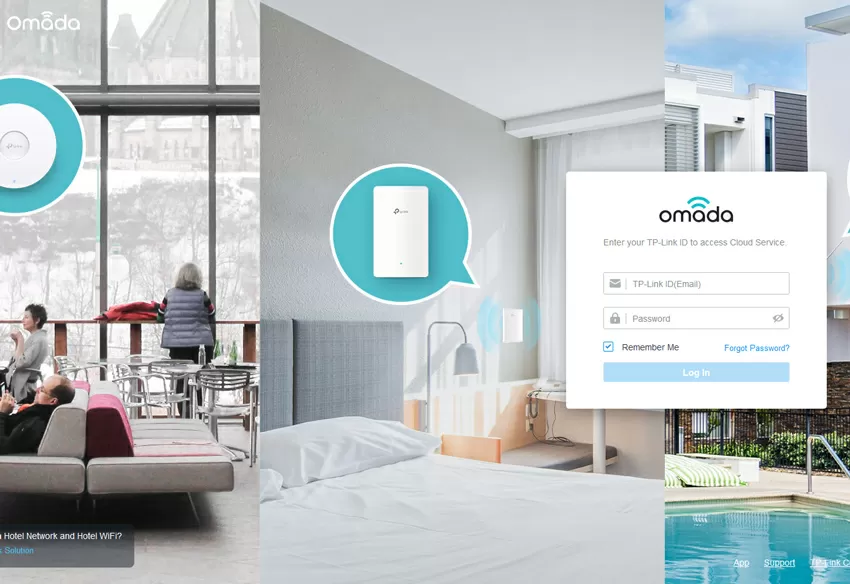
Well, all that remains is to download the Omada program to your smartphone, select a connection to the Cloud Center, enter your username and password - and you can safely go to the resort to relax: all the functionality of Omada will be in the palm of your hand.
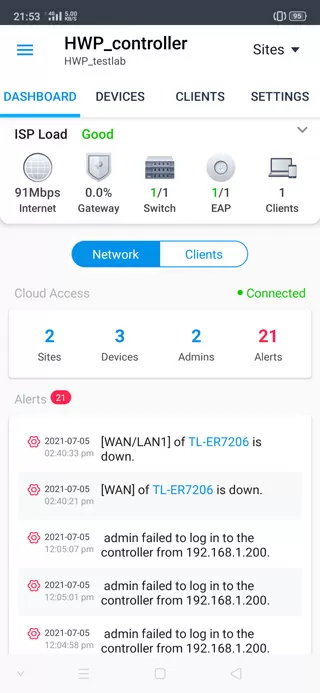
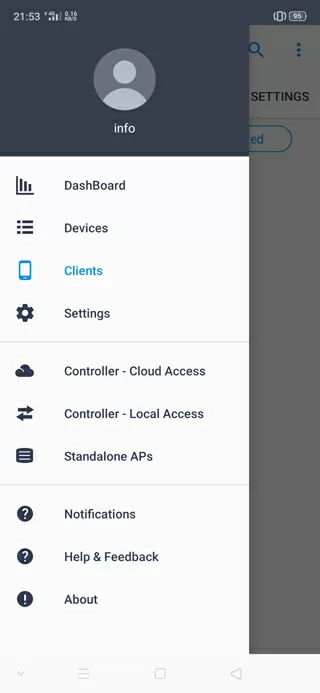
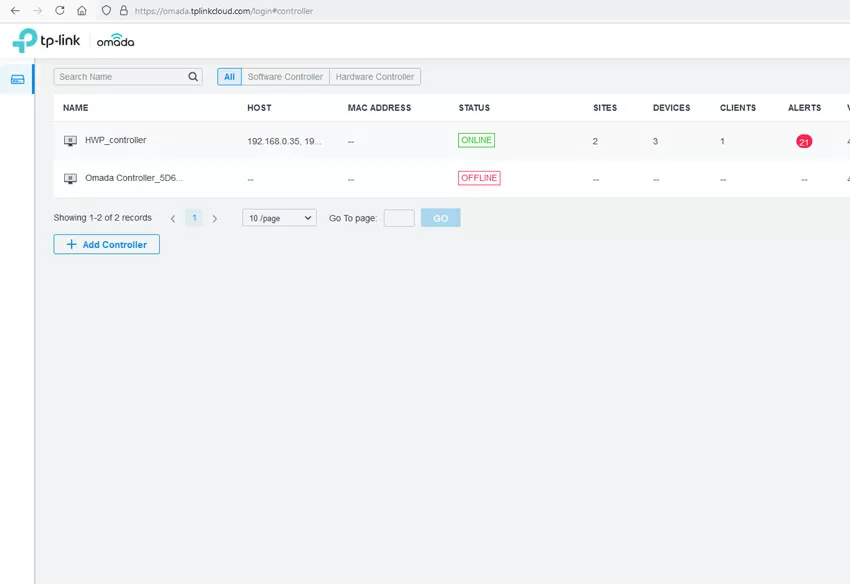
Without an Internet browser that always slows down, with all the graphs and icons, with all the objects added to the controller - you have a full-fledged cloud service, and it doesn't matter that the controller itself is hidden behind NAT.
Conclusions
The task of a modern SDN controller is also to maintain the simplicity of working with the network as it grows, and TP-Link has worked out this moment perfectly. Even if you have one unit of TP-Link equipment in your company, using Omada will give its advantages in convenience and information content. But like any modern product, this solution has its pros and cons.
Disadvantages:
- The Omada functionality restricts some devices connected to it. For example, not all the features of the switch are implemented in Omada, and there's nothing you can do about it - either the switch is registered in the controller and controlled by it, or it stands separately.
- There is no way to manually click on a client and add it to an existing profile, to a VLAN, or ban it altogether. That is, your interaction with the client is reduced to limiting the speed and allocating a static IP address.
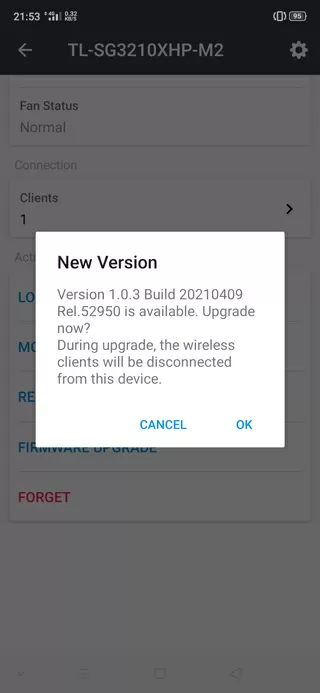
- Automatic firmware update works only when you connect to a cloud account
- There is no integration with the vendor's technical support service
Advantages:
- Everything is free. Omada works without licenses, serial numbers and service packages
- Very easy to add and remove devices on the network. No need to scan QR codes like Zyxel or shamanize with IP addresses, Omada will see all available devices on the network and allow you to intercept them. You can also easily "forget" them by resetting them to factory settings.
- Connection to the cloud is not required. Even a mobile application can work with a local IP address. In fact, it does not matter at all where in the topology of your network you put the controller: yes, even in another branch, but it remains strictly under your control.
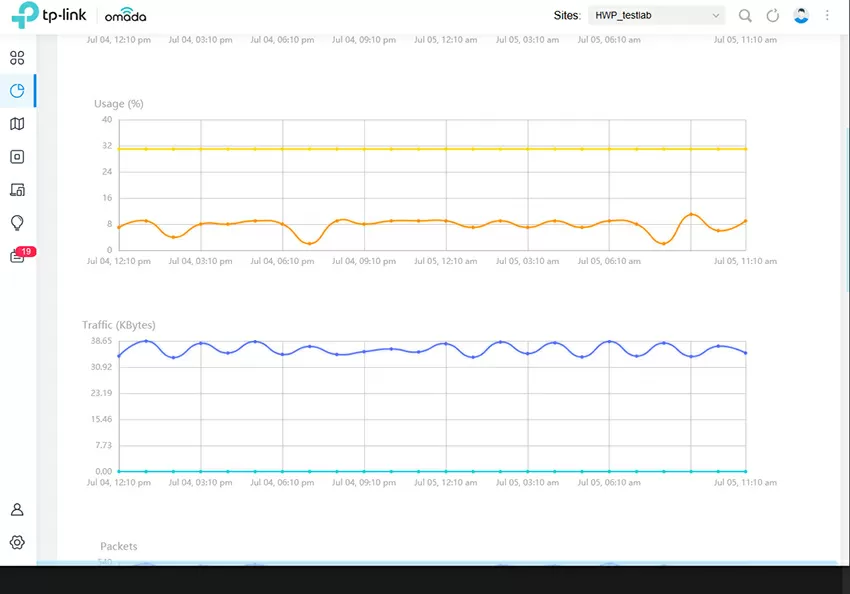
- Customizable interface with widgets and bright graphics
- The ability to store logs indefinitely, export them to a third-party server and interact with monitoring systems via SNMP
- The ability to observe interferences in the range of the access point operation
In conclusion, I would like to note that to get acquainted with Omada, it is not even necessary to buy a TP-Link device: you can download the controller from the company's website, make basic settings and see how it fits your projects.
Michael Degtjarev (aka LIKE OFF)
05/08.2021